Initiate Setup
Introduction
In this section we’ll begin with some prerequisite tasks you’ll need to complete to setup the lab environment before deploying any observability agents.
Access Your Cloud9 Instance
Your instructor will provide you with credentials to log into the AWS console and the link to the Cloud9 instance you will use during the labs.
Use the URL your instructor provided to get to the login page of the AWS console.
Use the Account ID, the IAM user name, and Password your instructor provided to login.

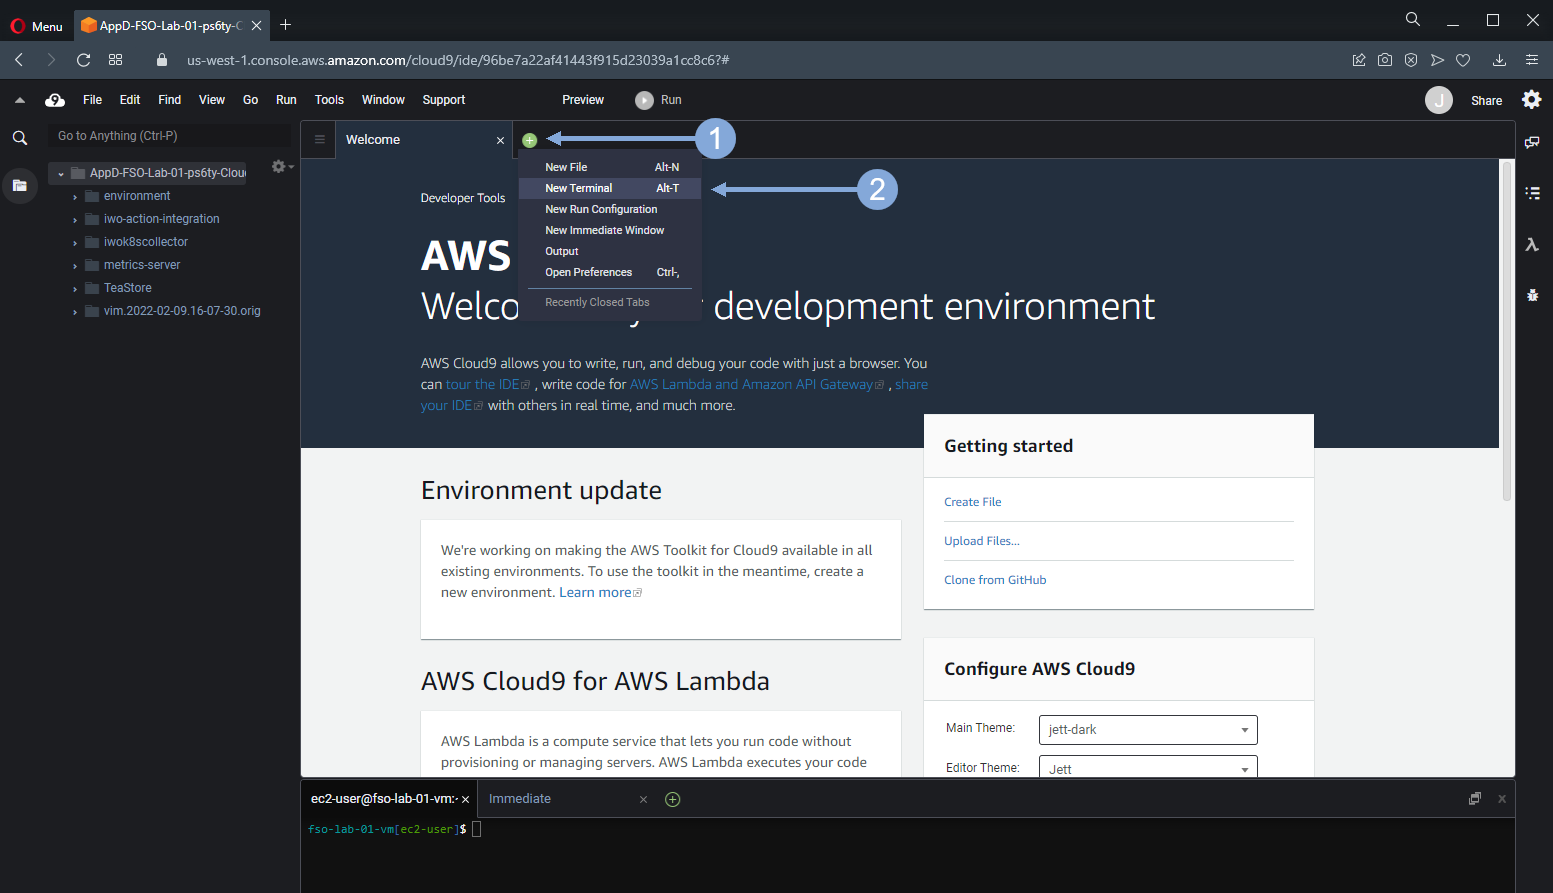
When you login you will be taken directly to your Cloud9 instance.
Open a new terminal window in your Cloud9 UI.
Validate Environment Variables
Use the command below to validate the lab number variable is set to your assigned lab number.
echo $fso_lab_numberThe output should look like the image below.

Use the command below to validate the AWS Region variable is set.
echo $aws_region_nameThe output should look like the image below.

Use the command below to validate the IKS cluster name variable has your assigned lab number in the name.
echo $iks_cluster_nameThe output should look like the image below.

Use the command below to validate the EKS cluster name variable has your assigned lab number in the name.
echo $aws_eks_cluster_nameThe output should look like the image below.

Use the command below to validate the IKS Kubeconfig file variable has your assigned lab number in the file name.
echo $iks_kubeconfig_filepathThe output should look like the image below.

Login to Intersight
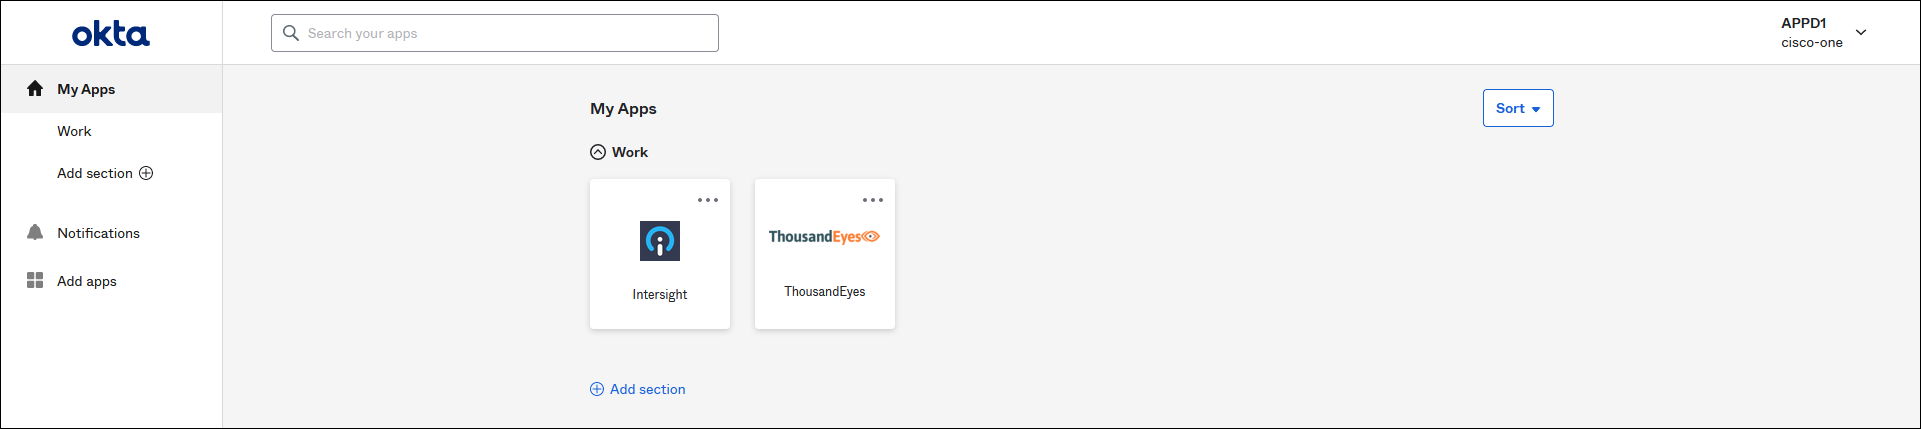
Use the URL below to navigate to okta in your browser.
https://cisco-one.okta.com/Enter the Cisco User email (email ending in @cisco-one.com) provided by your instructor for the Username and the associated Cisco Password for the Password and click on the Sign in button.

Now click on the Intersight tile to login to Intersight.
Obtain IKS Kubeconfig
Once you are logged in, use the steps below to download the IKS Kubeconfig file to your local file system.
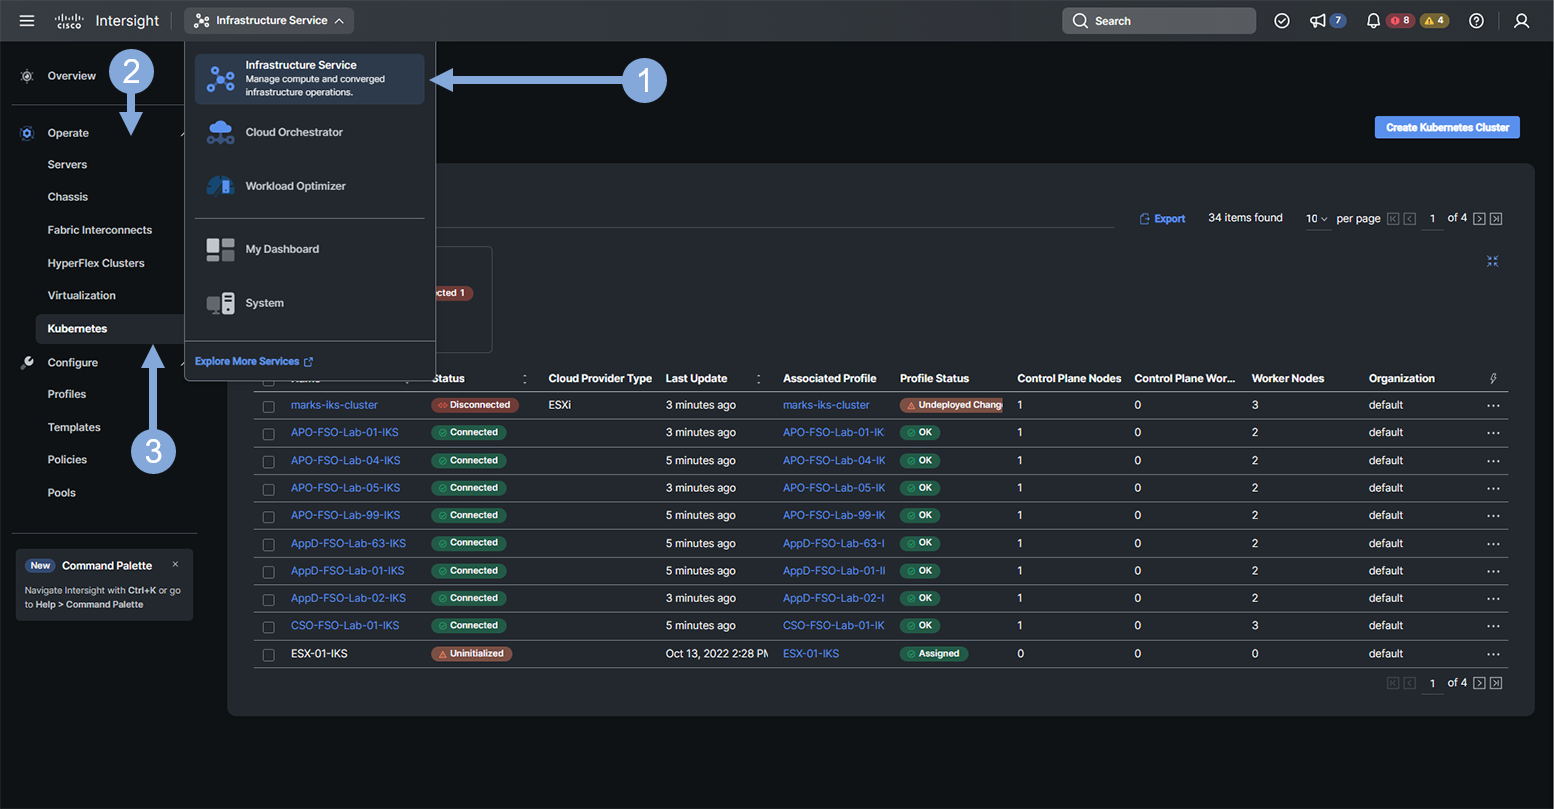
- Once you are logged in, from the drop-down menu, select Infrastructure Service
- Click on the Operate tab on the left menu
- Click on the Kubernetes tab
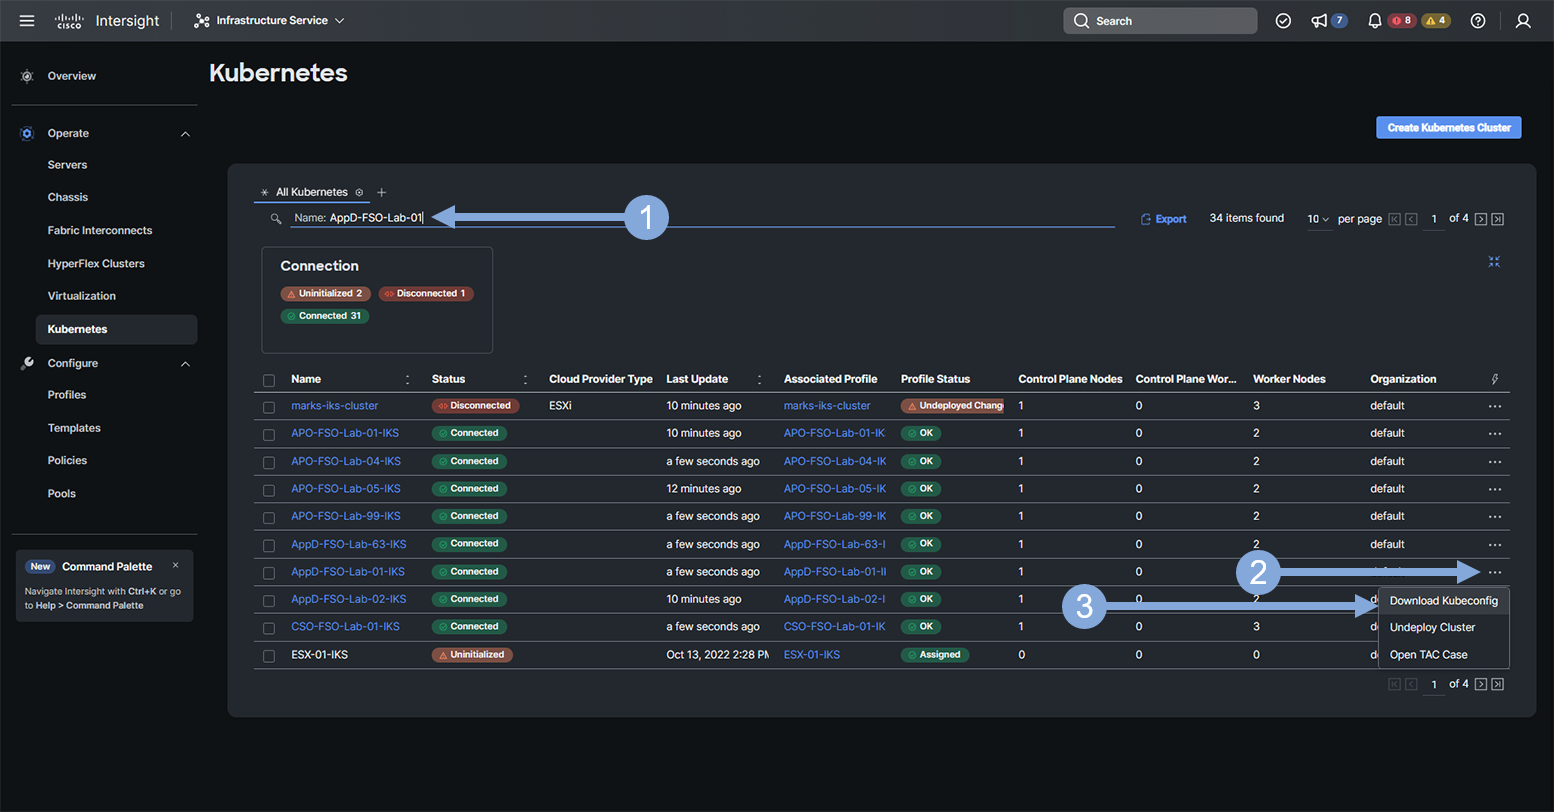
- Type in AppD-FSO-Lab-{your-lab-number} in the search box and hit enter
- Click on the three dots on the far right of your IKS Kubernetes cluster
- Select the Download Kubeconfig drop-down option
- Save the file to your local file system
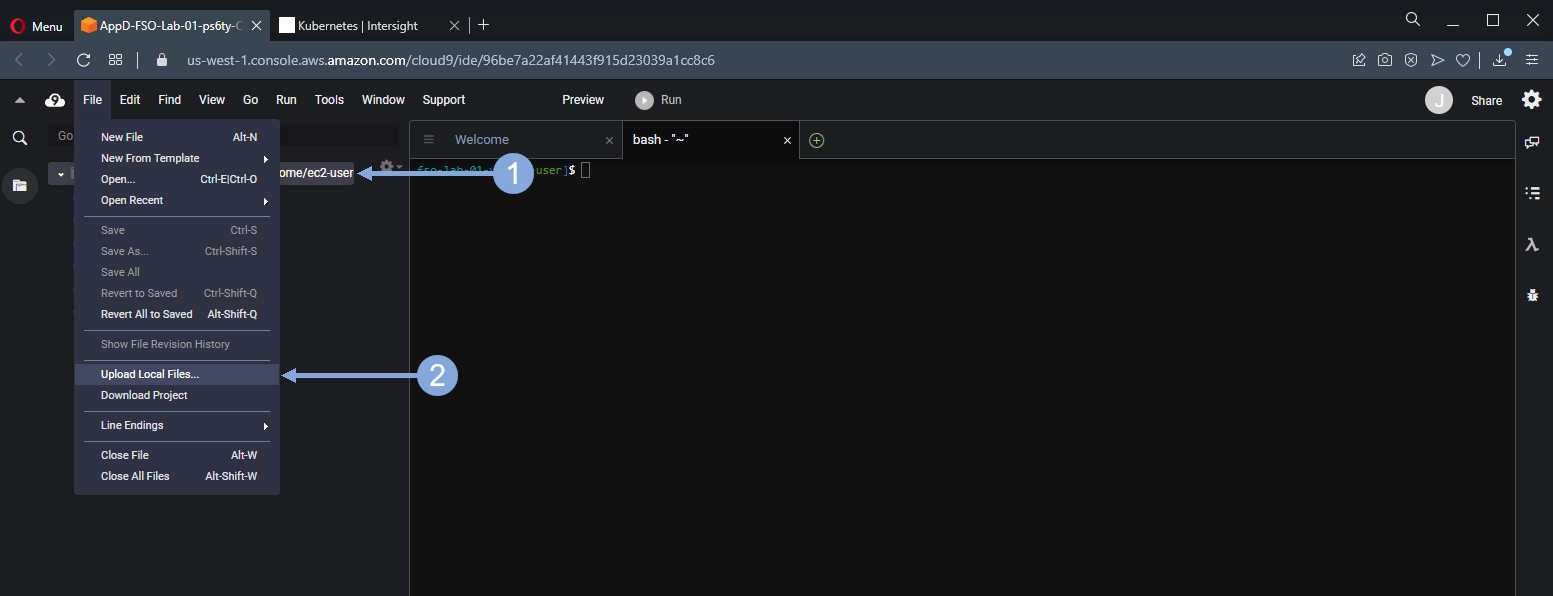
Now upload the IKS Kubeconfig file to your Cloud9 file system using the steps below.
- On the left hand file system tree select the root directory that is /home/ec2-user
- From the top menu select File > Upload Local Files … then find and select the IKS Kubeconfig file on your local file system to upload it
Use the commands below to validate the EKS Kubeconfig file is on the Cloud9 file system.
cd /home/ec2-user

ls -l
The output should look like the image below.

Use the command below to view the worker nodes in the IKS Kubernetes cluster.
kubectl get nodes -o wide --kubeconfig $iks_kubeconfig_filepathThe output should look like the image below.

Obtain EKS Kubeconfig
Use the commands below to pull down the EKS Kubeconfig file to your Cloud9 instance.
cd /home/ec2-user

aws eks --region $aws_region_name update-kubeconfig --name $aws_eks_cluster_name
The output should look like the image below.

Use the command below to view the worker nodes in the EKS Kubernetes cluster.
kubectl get nodes -o wideThe output should look like the image below.

Deploy TeaStore Application
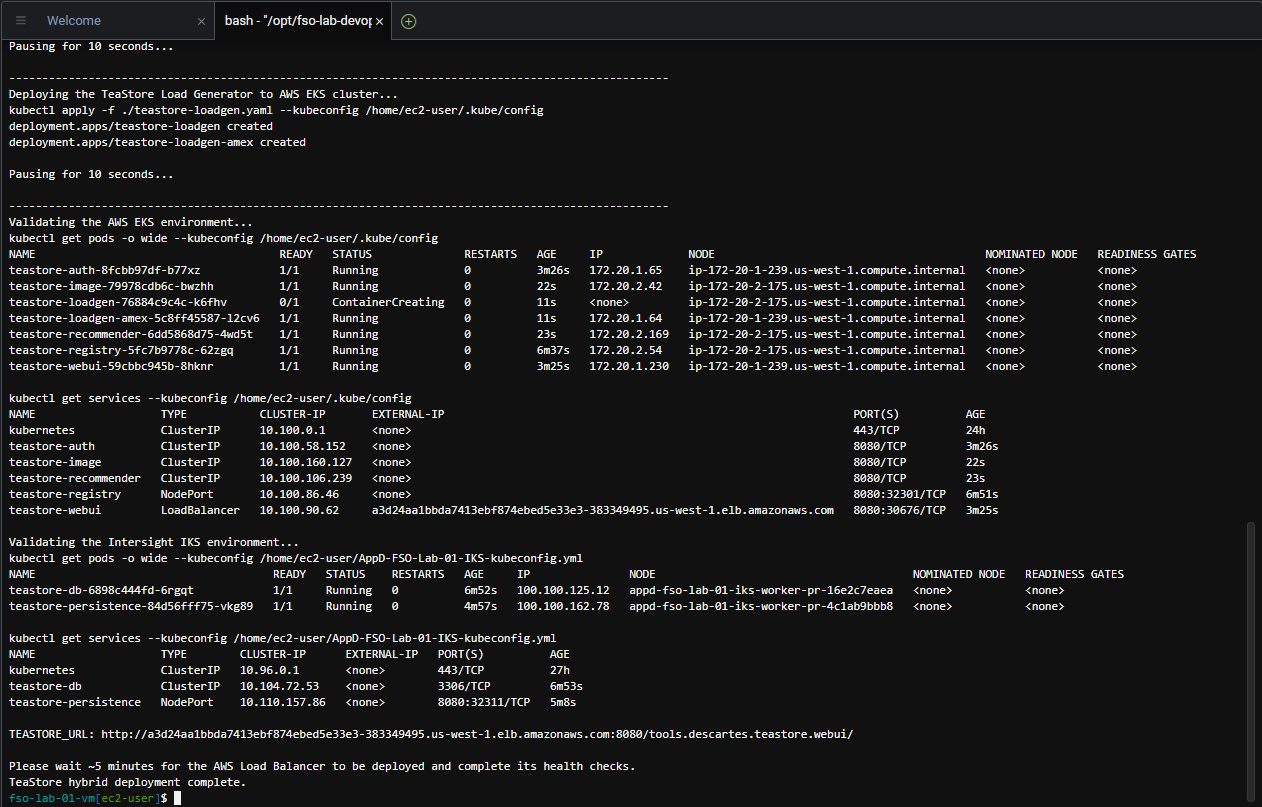
Use the commands below to deploy the TeaStore application to the IKS and EKS Kubernetes clusters.
cd /opt/fso-lab-devops/provisioners/scripts/common

./deploy_teastore_application_to_hybrid_kubernetes.sh
The output should look like the image below and the deployment should take ~8 minutes to complete.
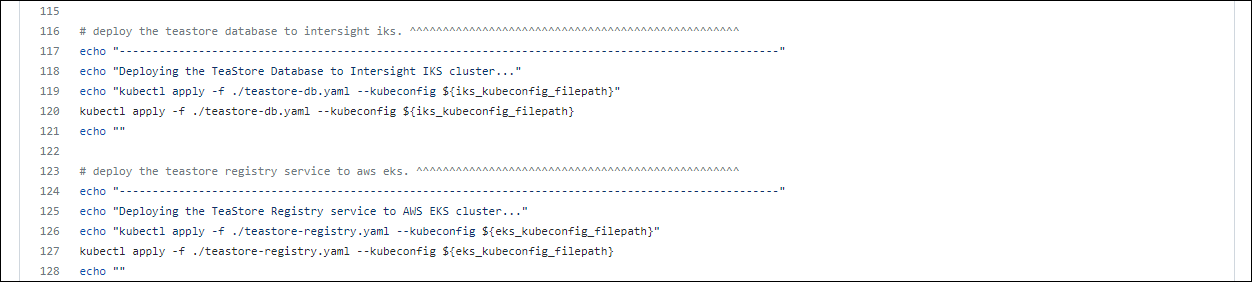
What mechanism is this script using to deploy the application?
The script is using kubectl to apply the application services using the YAML deployment file for each service.
The command on line 120 is the full command used to deploy the database to the IKS cluster.
The command on line 127 is the full command used to deploy the registry service to the EKS cluster.
Listed below are the components / services that the script deploys to their respective Kubernetes cluster.
| Component / Service Deployed | Kubernetes Cluster |
|---|---|
| teastore-db | IKS |
| teastore-persistence | IKS |
| teastore-registry | EKS |
| teastore-auth | EKS |
| teastore-webui | EKS |
| teastore-recommender | EKS |
| teastore-image | EKS |
| teastore-orderprocessor | EKS |
| teastore-loadgen | EKS |
Confirm TeaStore Deployment
Use the command below to confirm deployment to the IKS Kubernetes cluster.
kubectl get pods -o wide --kubeconfig $iks_kubeconfig_filepathThe output should look like the image below.

Use the command below to confirm deployment to the EKS Kubernetes cluster.
kubectl get pods -o wideThe output should look like the image below.

Use the command below to obtain the URL to the TeaStore UI.
teastoreurlThe output should look like the image below.

Now left-click on the URL and select ‘Open’.

Now click on the Status link to confirm the status of all the services.
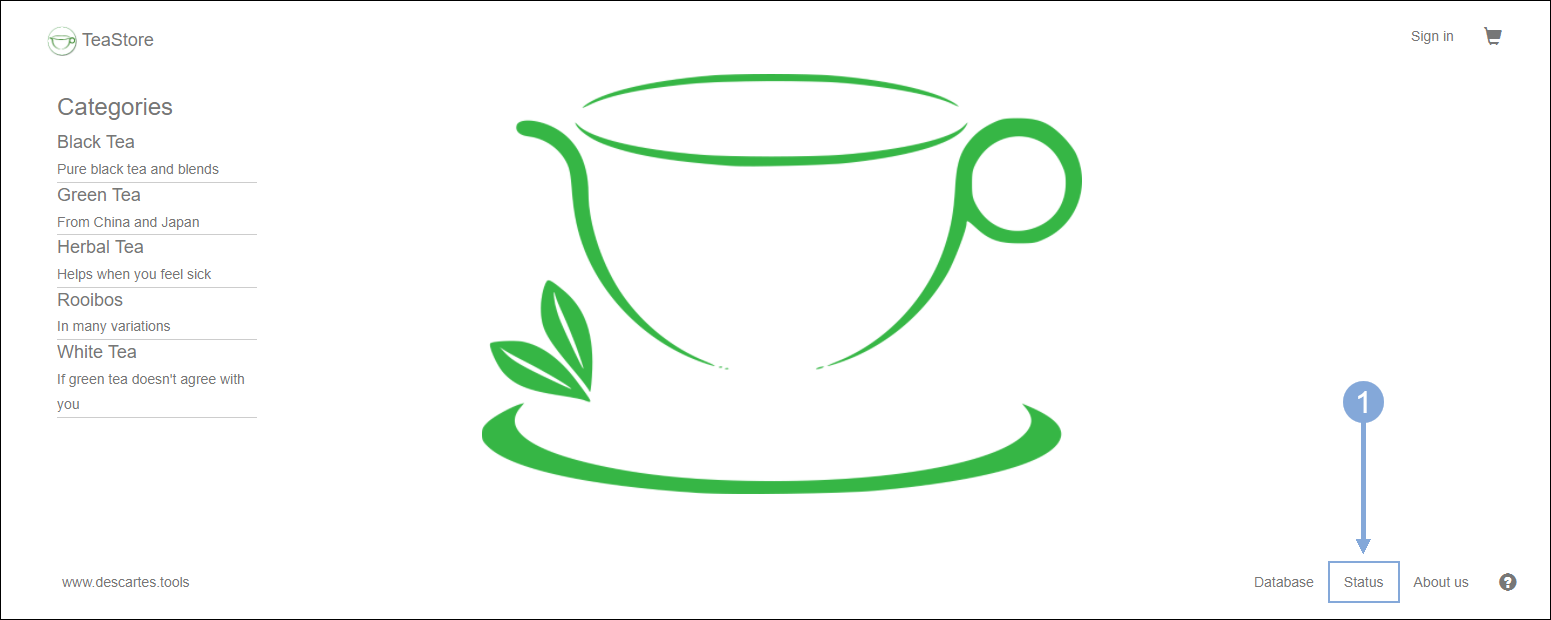
Validate that All Five Services have a green status as seen below.
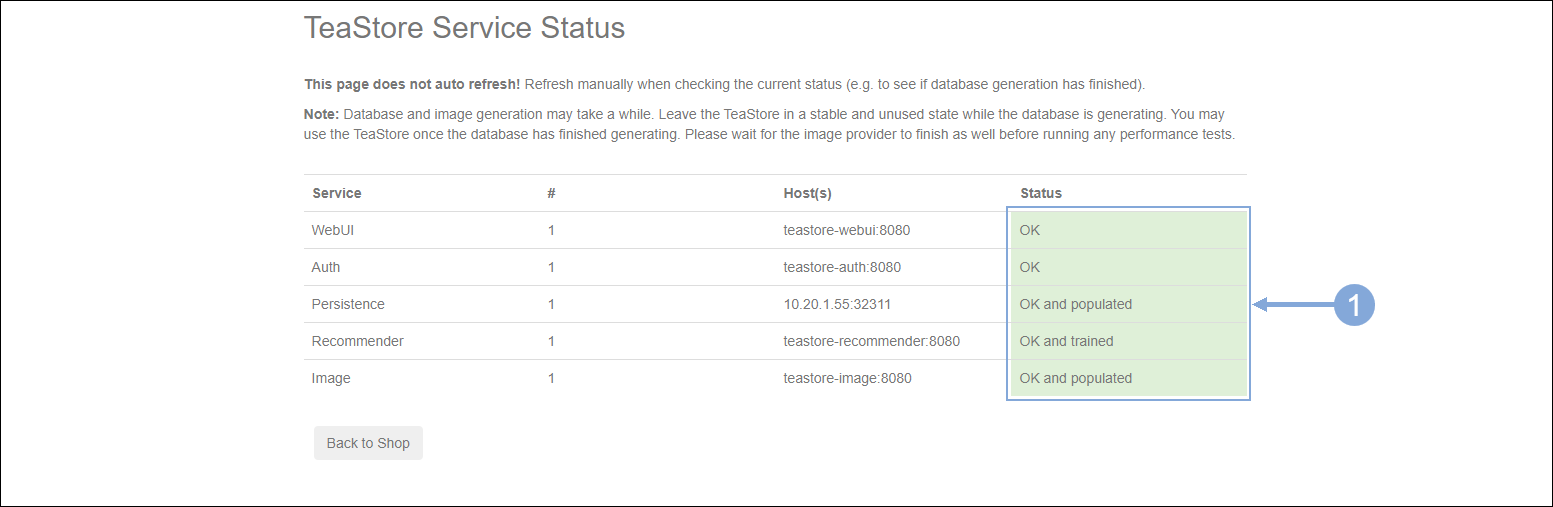
What if one or more services don’t have a green status?
Undeploy the TeaStore application using the steps below if one or more services don’t have a green status.
cd /opt/fso-lab-devops/provisioners/scripts/common

./undeploy_teastore_application_from_hybrid_kubernetes.sh
Once the undeployment of the TeaStore application is complete you can deploy it again using the steps below.
cd /opt/fso-lab-devops/provisioners/scripts/common

./deploy_teastore_application_to_hybrid_kubernetes.sh
Now verify the status of the services using the steps you used previously (note that your teastoreurl will have changed).
Run Workshop Setup
Use the commands below to run the workshop setup utility.
cd /home/ec2-user/environment/workshop

./setupWorkshop.sh
The output should look like the image below.
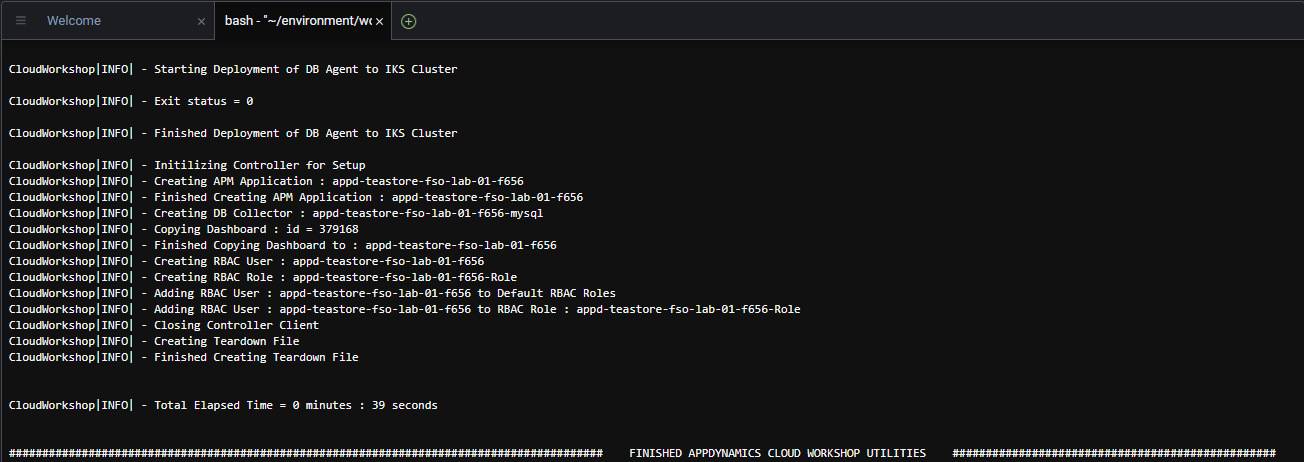
What steps are being performed with this setup utility?
- Populates the AppDynamics Controller connection settings for the AppDynamics agents
- Deploys the AppDynamics Database agent to the IKS Kubernetes cluster
- Creates the AppDynamics Database collector in the Controller allowing the Database agent to monitor the database
- Creates various other artifacts in the AppDynamics Controller (APM Application, RBAC User & Role, Custom Dashboard)
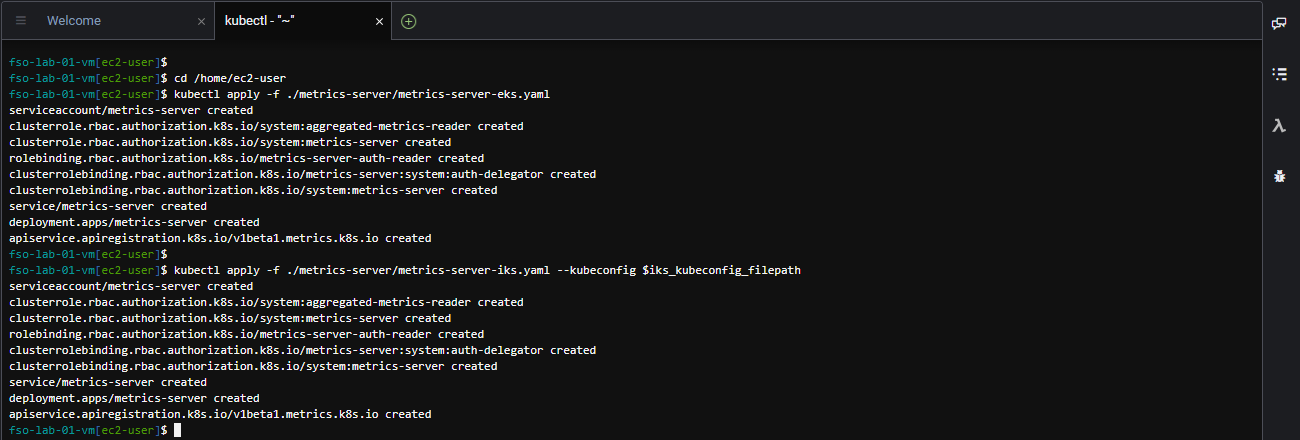
Deploy Metrics Server
Use the commands below to deploy the metric server to both the IKS and EKS cluster.
cd /home/ec2-user

kubectl apply -f ./metrics-server/metrics-server-eks.yaml

kubectl apply -f ./metrics-server/metrics-server-iks.yaml --kubeconfig $iks_kubeconfig_filepath
The output should look like the image below.
Next
We’ll configure and deploy several different observability agents.