Deploy Agents
Introduction
Now that you’ve completed all the setup prerequisites for your lab environment and deployed the TeaStore application, it’s time to deploy the different observability agents.
Deploy AppDynamics Agents
Use the commands below to deploy the AppDynamics agents to the IKS and EKS Kubernetes clusters.
cd /home/ec2-user/environment/workshop

./deploy_appdynamics_agents.sh
The output should look like the image below.
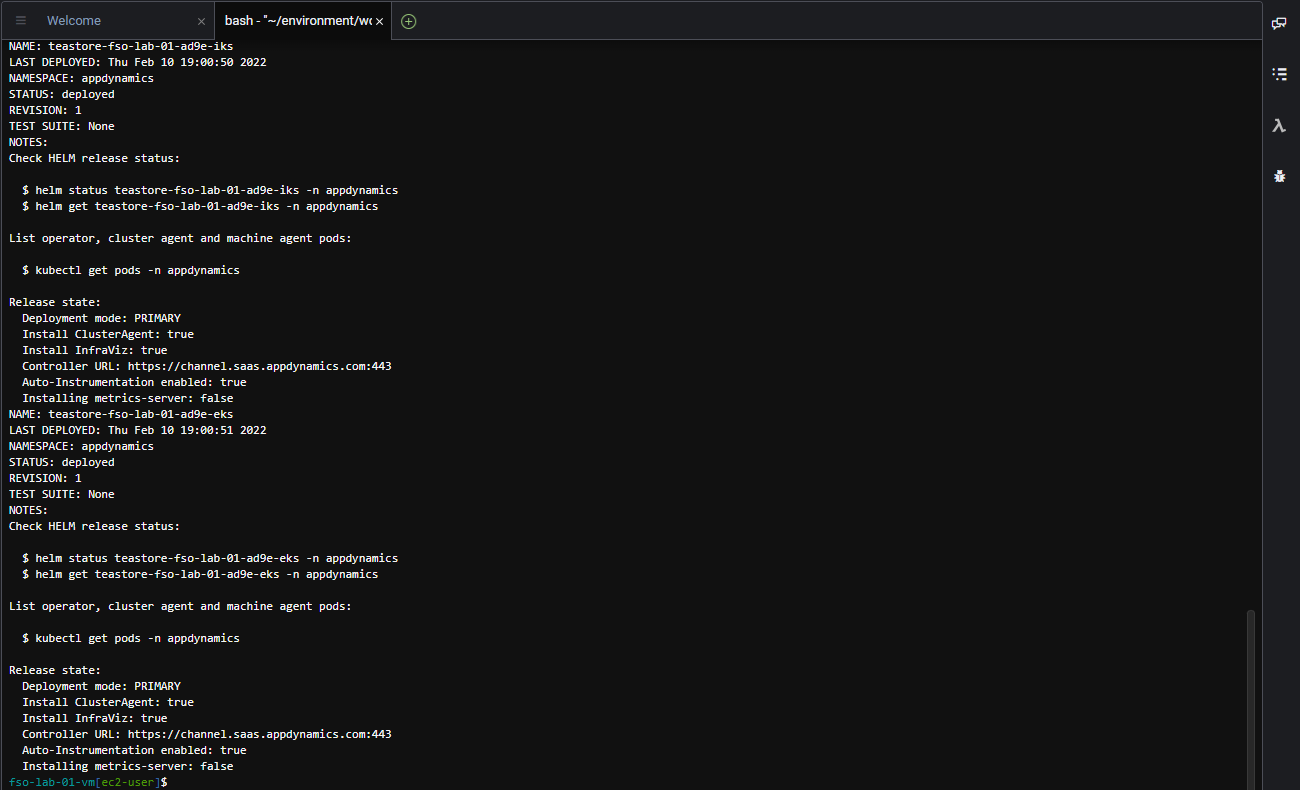
What AppDynamics agents were deployed and how?
Though there are several different ways to deploy these agents, we’ve used the AppDynamics Helm Chart that simplified the deployment of agents to the Kubernetes clusters.
Below is the list of agents deployed by the Helm chart:
- Cluster Agent
- Java APM Agent
- Server Visibility Agent
- Network Visibility Agent
- Secure Application Agent
How is the Helm chart configured?
In our deployment we are overriding the helm chart default values.yaml file to provide the specific configuration for our environment.
Use the command below in your Cloud9 terminal to view the template file used to generate the final version of the values.yaml file that is used in our deployment.
cat -n /home/ec2-user/environment/workshop/values-ca1.yaml.template- On line 1 and line 2 we are specifying that we want to deploy the Cluster Agent and the Server Visibility Agent.
- On lines 6 through 11 we- On lines 6 through 11 we will provide the connection details to the AppDynamics Controller.
- On lines 8 and 9 the username and password for an AppDynamics Controller user with elevated privilages are required only if you are configuring Auto-Instrumentation of APM Agents which we’ll look at in the next section.

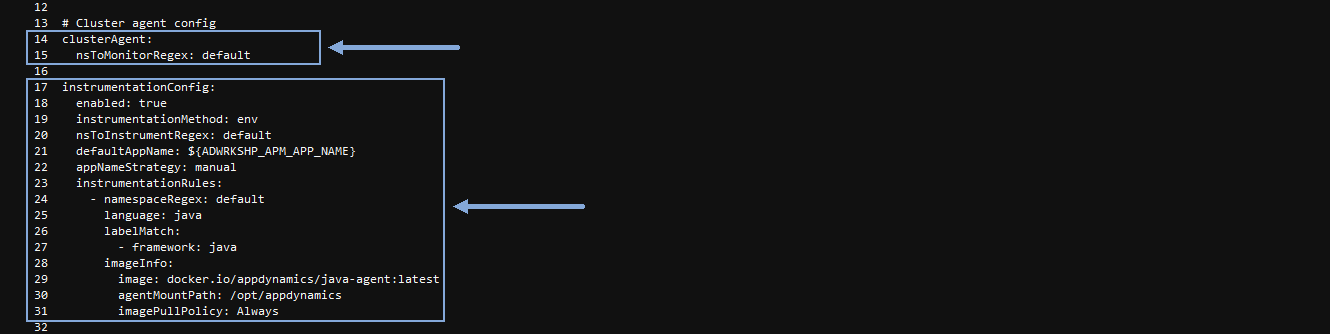
- On line 15 we are specifying the namespace(s) we want the Cluster Agent to monitor.
- On lines 17 through 31 we see the configuration for the Auto-Instrumentation of APM Agents
- In this case we have one instrumentation rule defined for the Java APM Agent to label match on deployments with the framework: java label
Deploy IWO Collectors to EKS
Use a terminal window in your Cloud9 instance to perform the next series of steps.
Use the commands below to create the namespace in the EKS cluster for the IWO collectors.
cd /home/ec2-user/iwok8scollector

kubectl create namespace iwo-collector
The output should look like the image below.

Use the commands below to deploy the IWO collectors to the EKS cluster.
cd /home/ec2-user
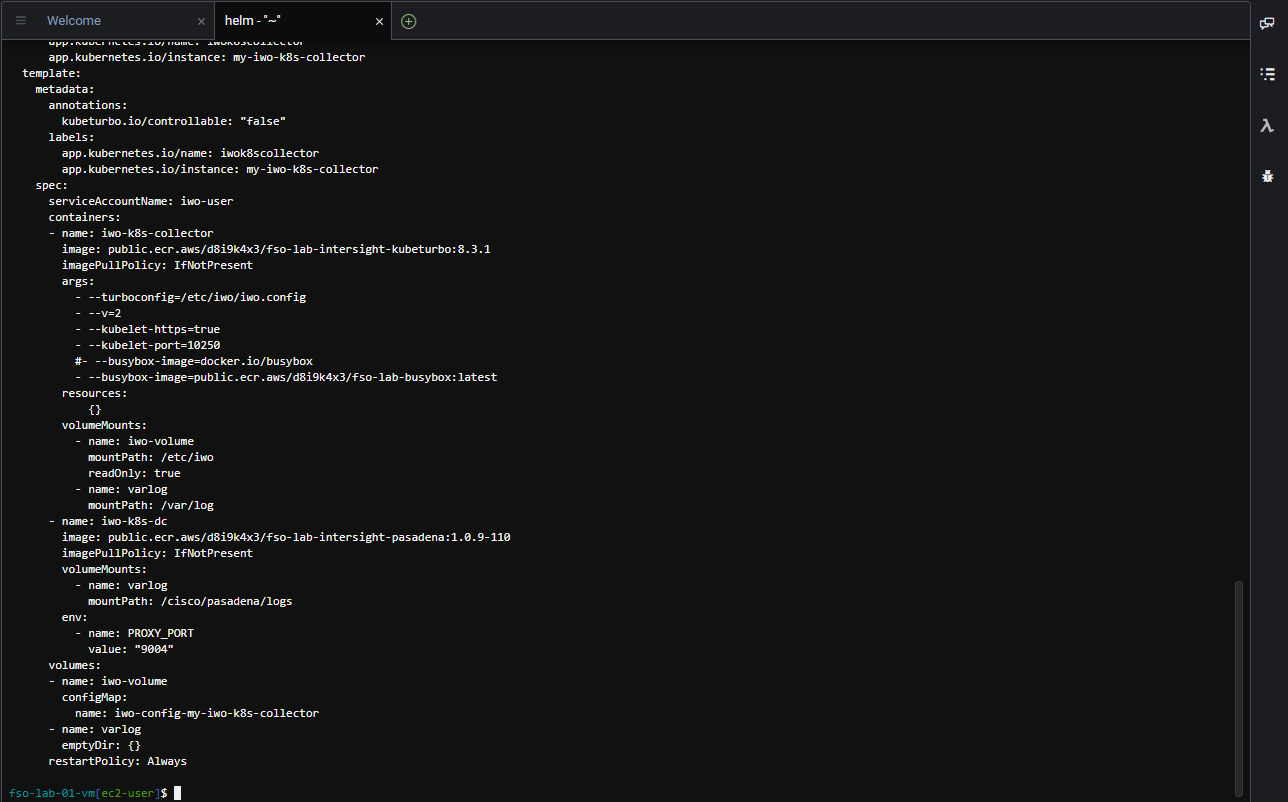
helm install --debug my-iwo-k8s-collector ./iwok8scollector/ --namespace iwo-collector --set iwoServerVersion=8.3 --set collectorImage.tag=8.3.1 --set targetName=$aws_eks_cluster_nameThe output should look like the image below.

Deploy IWO Collectors to IKS Reference Only
Hold On A Second …
While the steps to deploy the IWO Collectors to the IKS cluster are defined below, these steps have already been done for you in this workshop. The steps are here for your reference so you have all the steps documented that were part of the complete IWO setup.
Use the commands below to create the namespace in the IKS cluster for the IWO collectors.
cd /home/ec2-user/iwok8scollector

kubectl create namespace iwo-collector --kubeconfig $iks_kubeconfig_filepath
The output should look like the image below.

Use the commands below to deploy the IWO collectors to the IKS cluster.
cd /home/ec2-user

helm install --debug my-iwo-k8s-collector ./iwok8scollector/ --namespace iwo-collector --set iwoServerVersion=8.3 --set collectorImage.tag=8.3.1 --set targetName=$iks_cluster_name --kubeconfig $iks_kubeconfig_filepath
The output should look like the image below.
Claim Target for EKS
Use the commands below to verify the deployment of the IWO collectors in the EKS cluster.
kubectl get pods -o wide -n iwo-collectorHighlight and copy the name of the first pod in the list of pods returned for the EKS cluster and save that pod name for the next step

Use the command below to access the IWO collector running in EKS. Use the collector pod name running in EKS that you obtained previously to substitute {your-eks-pod-name-saved-previously} in the command below.
Be sure to come back and terminate this process after you have finished claiming the target for EKS ( Ctrl+C for Windows ) ( Command+C for Mac )
kubectl -n iwo-collector port-forward {your-eks-pod-name-saved-previously} 9110The output should look like the image below.

Open a new terminal window in Cloud9 and use the command below to return the Device ID for the IWO collector running in EKS.
curl -s http://localhost:9110/DeviceIdentifiersNow highlight the Device ID (without including the double quotes) and save that ID in a text file.

Next use the command below to return the Security Token for the IWO collector running in EKS.
curl -s http://localhost:9110/SecurityTokensNow highlight the Security Token value (without including the double quotes) and save that value in a text file.

Use the credentials for Cisco Intersight provided by your instructor to login to Intersight if you’ve been logged out.
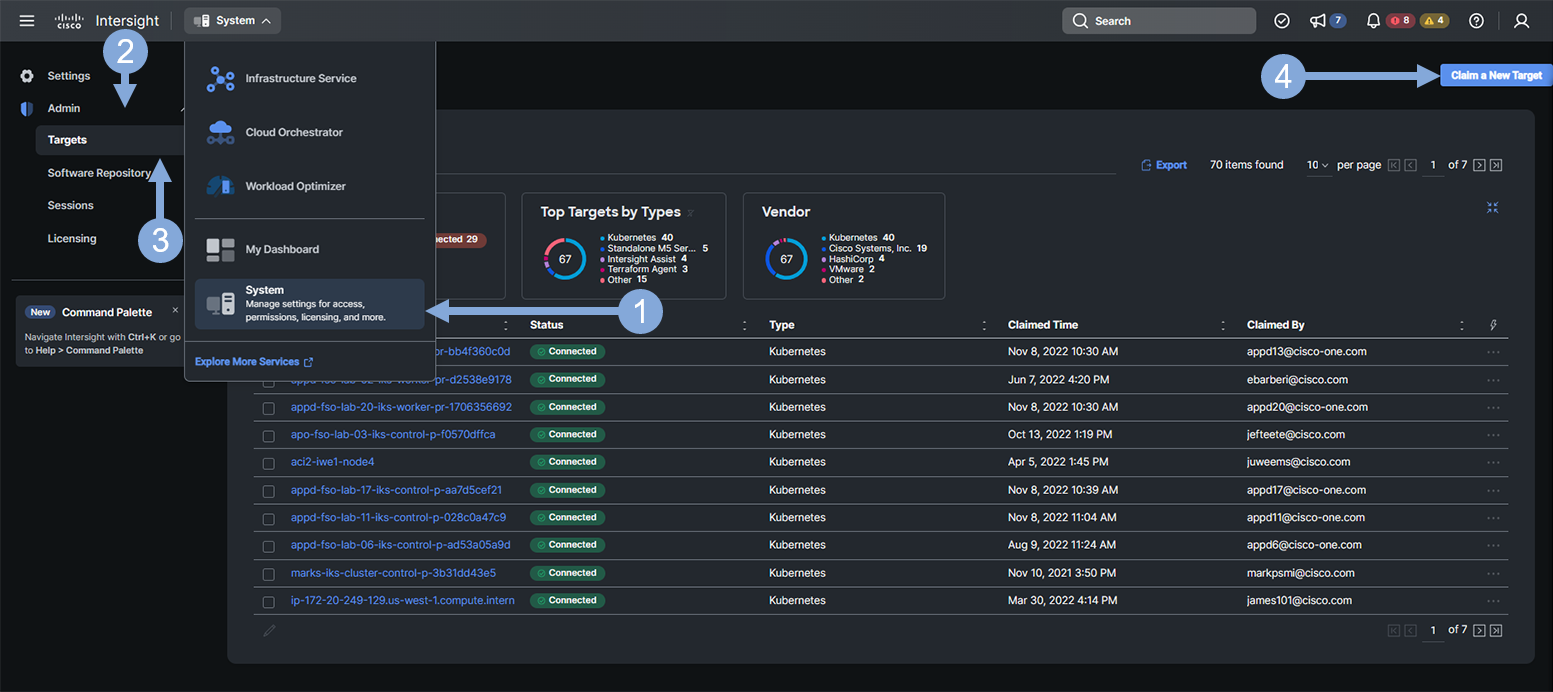
Next use the steps below to claim a new target for your EKS Kubernetes cluster.
- From the pull-down menu, select System
- Click on the ‘Admin’ tab on the left menu
- Click on the ‘Targets’ tab
- Click on the ‘Claim a New Target’ button
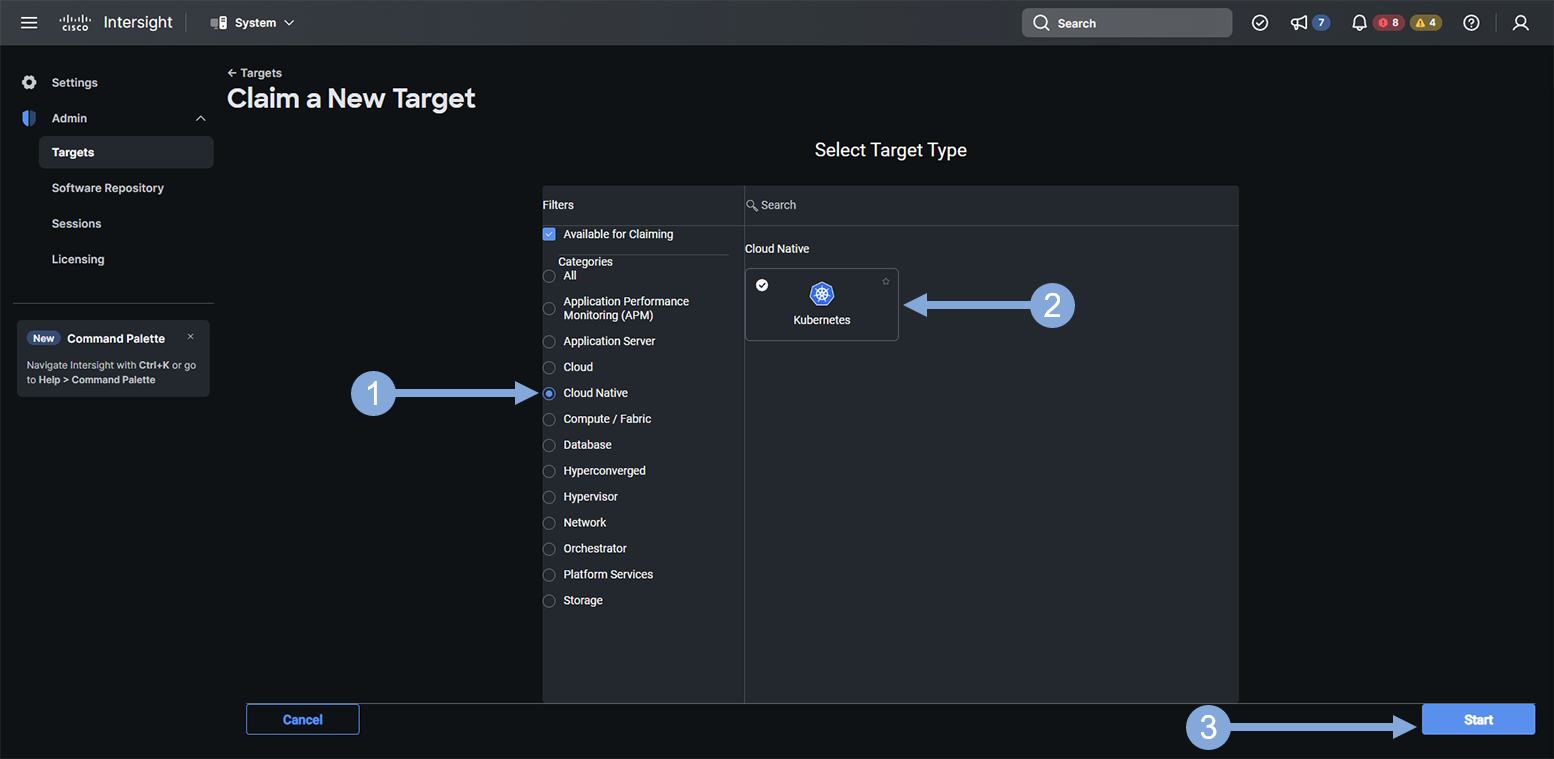
Now use the steps below to select the Kubernetes target type.
- Click on the ‘Cloud Native’ category
- Click on the ‘Kubernetes’ tile
- Click on the ‘Start’ button
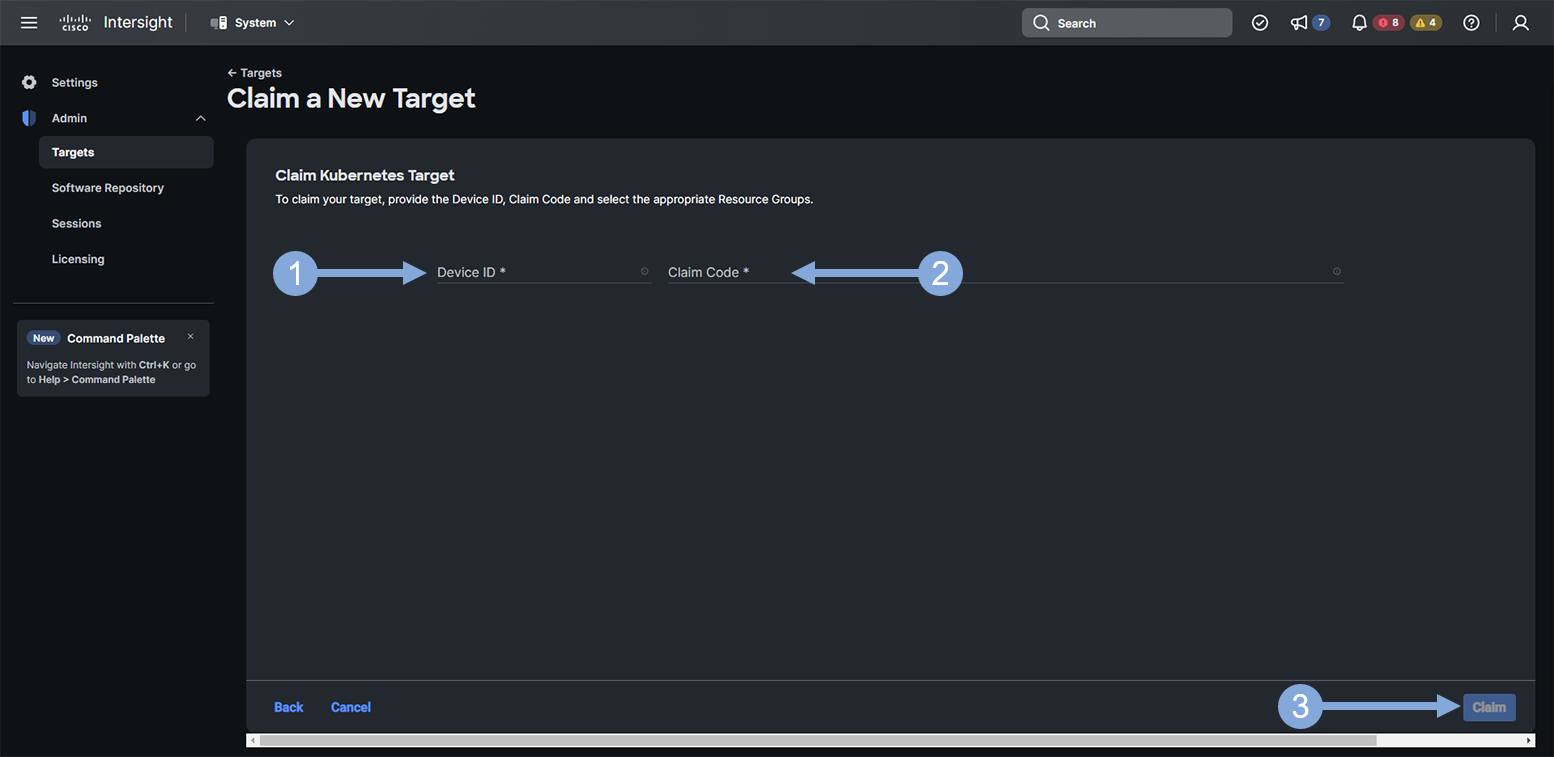
Use the steps below to finish creating your target.
- Enter the Device ID you saved for the IWO collector running in EKS in the Device ID field
- Enter the Security Token you saved for the IWO collector running in EKS in the Claim Code field
- Click on the ‘Claim’ button
Claim Target for IKS Reference Only
Hold On A Second …
While the steps to claim the Kubernetes target for the IKS cluster are defined below, these steps have already been done for you in this workshop. The steps are here for your reference so you have all the steps documented that were part of the complete IWO setup.
Use the commands below to verify the deployment of the IWO collectors in the IKS cluster.
kubectl get pods -o wide -n iwo-collector --kubeconfig $iks_kubeconfig_filepathHighlight and copy the name of the first pod in the list of pods returned for the IKS cluster and save that pod name for the next step

Use the command below to access the IWO collector running in IKS. Use the collector pod name running in IKS that you obtained previously to substitute {your-iks-pod-name-saved-previously} in the command below.
Be sure to come back and terminate this process after you have finished claiming the target for IKS ( Ctrl+C for Windows ) ( Command+C for Mac )
kubectl -n iwo-collector port-forward {your-iks-pod-name-saved-previously} 9110 --kubeconfig $iks_kubeconfig_filepathThe output should look like the image below.

Open a new terminal window in Cloud9 and use the command below to return the Device ID for the IWO collector running in IKS.
curl -s http://localhost:9110/DeviceIdentifiersNow highlight the Device ID (without including the double quotes) and save that ID in a text file.

Next use the command below to return the Security Token for the IWO collector running in IKS.
curl -s http://localhost:9110/SecurityTokensNow highlight the Security Token value (without including the double quotes) and save that value in a text file.

Use the credentials for Cisco Intersight provided by your instructor to login to Intersight if you’ve been logged out.
Next use the steps below to claim a new target for your IKS Kubernetes cluster.
- Click on the ‘Admin’ tab on the left menu
- Click on the ‘Targets’ tab
- Click on the ‘Claim a New Target’ button
Now use the steps below to select the Kubernetes target type.
- Click on the ‘Cloud Native’ category
- Click on the ‘Kubernetes’ tile
- Click on the ‘Start’ button
Use the steps below to finish creating your target.
- Enter the Device ID you saved for the IWO collector running in IKS in the Device ID field
- Enter the Security Token you saved for the IWO collector running in IKS in the Claim Code field
- Click on the ‘Claim’ button
Claim Target for AWS Reference Only
Hold On A Second …
While the steps to claim the AWS target for the EKS cluster are defined below, these steps have already been done for you in this workshop. The steps are here for your reference so you have all the steps documented that were part of the complete IWO setup.
Use the credentials for Cisco Intersight provided by your instructor to login to Intersight if you’ve been logged out.
Next use the steps below to claim a new AWS target for your EKS Kubernetes cluster.
- Click on the ‘Admin’ tab on the left menu
- Click on the ‘Targets’ tab
- Click on the ‘Claim a New Target’ button
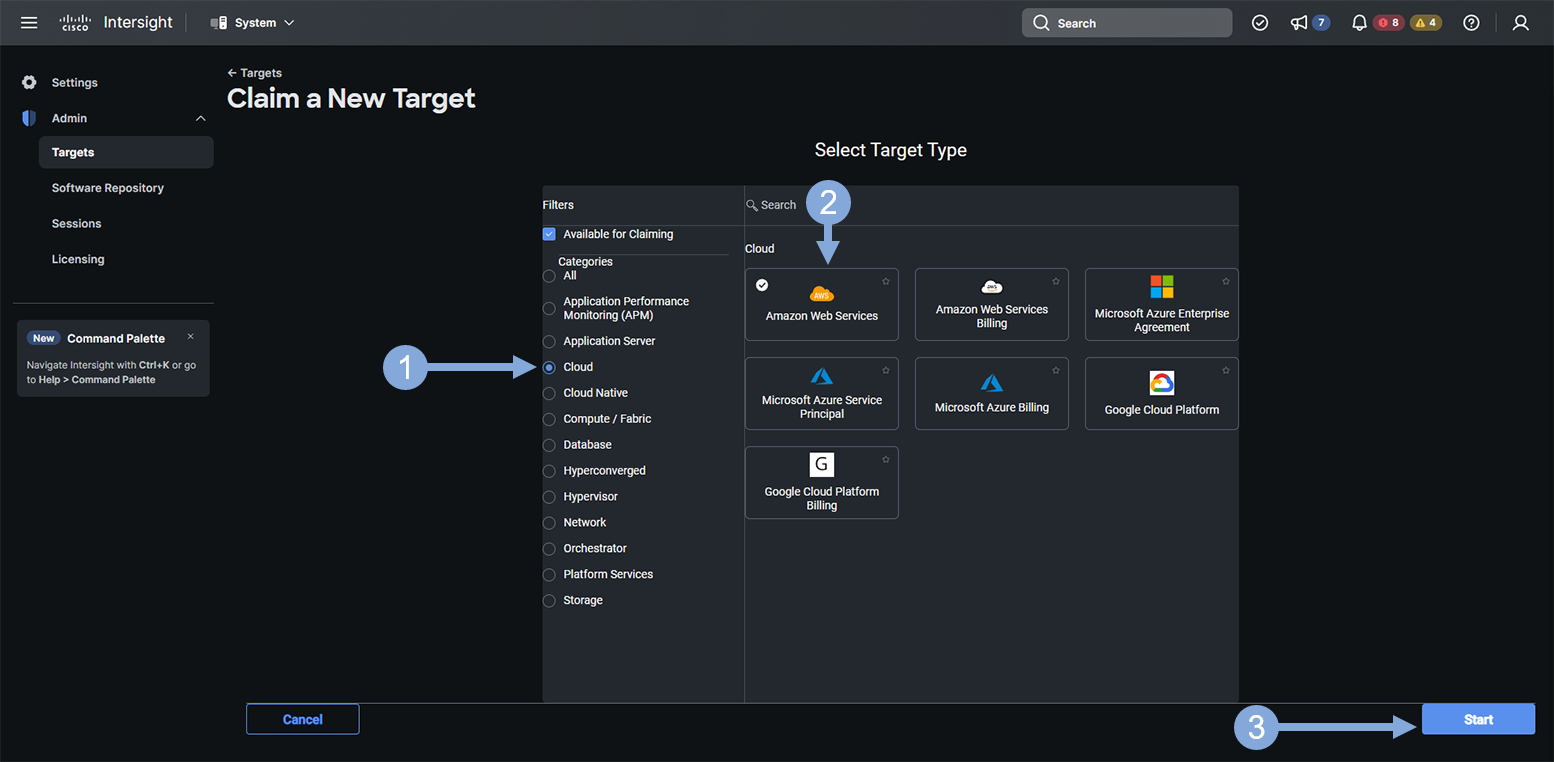
Now use the steps below to select the Amazon Web Services target type.
- Click on the ‘Cloud’ category
- Click on the ‘Amazon Web Services’ tile
- Click on the ‘Start’ button
Use the steps below to finish creating your target.
- Enter a descriptive name that represents you AWS target based on the context your using it for (IWO)
- Enter your AWS Access Key
- Enter your AWS Secret Access Key
- Click on the ‘Claim’ button

Claim Target for AppDynamics Reference Only
Hold On A Second …
While the steps to claim the AppDynamics target are defined below, these steps have already been done for you in this workshop. The steps are here for your reference so you have all the steps documented that were part of the complete IWO setup.
Use the credentials for Cisco Intersight provided by your instructor to login to Intersight if you’ve been logged out.
Next use the steps below to claim a new AppDynamics target.
- Click on the ‘Admin’ tab on the left menu
- Click on the ‘Targets’ tab
- Click on the ‘Claim a New Target’ button
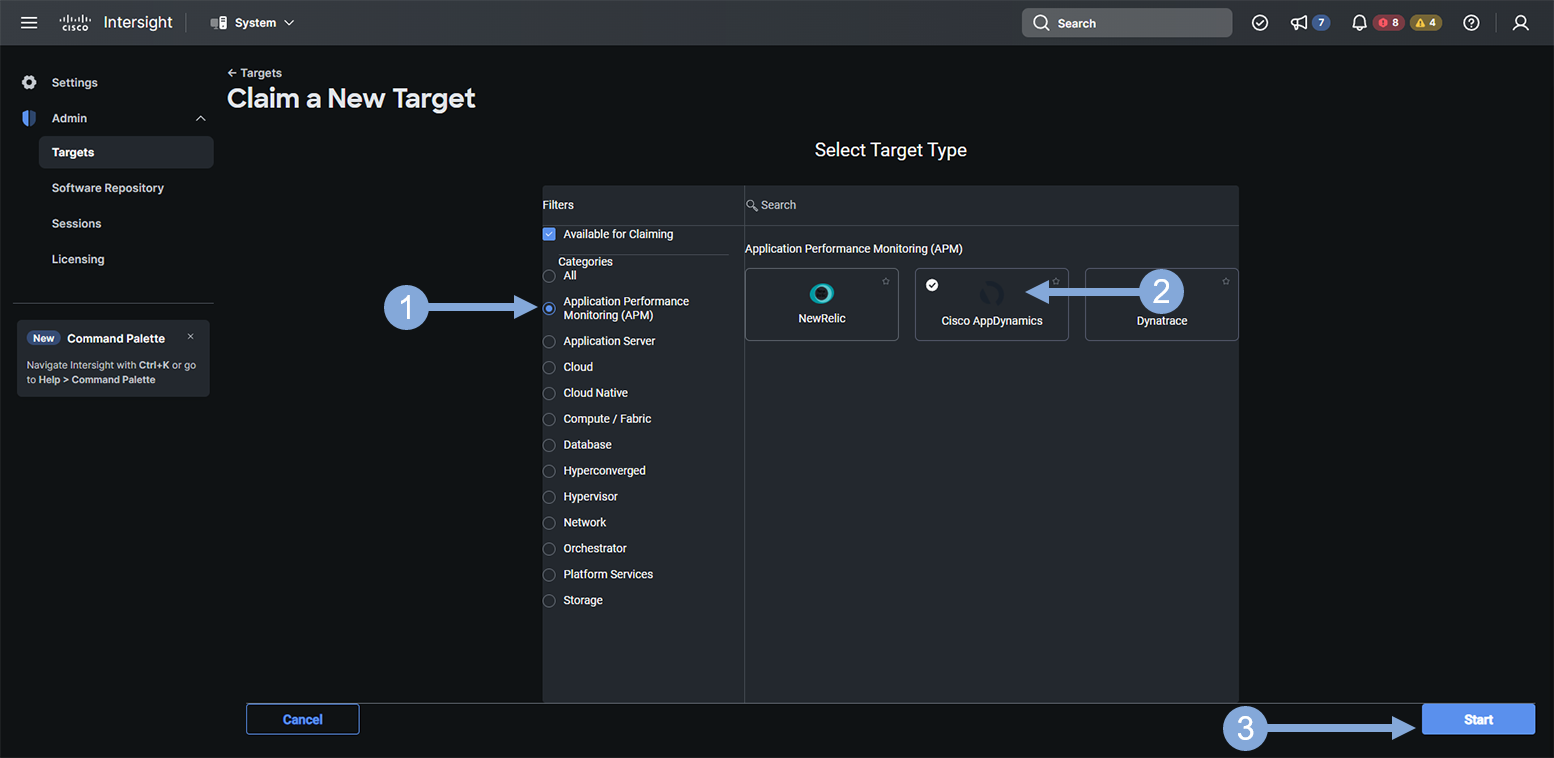
Now use the steps below to select the AppDynamics target type.
- Click on the ‘Guest OS Process / APM’ category
- Click on the ‘AppDynamics’ tile
- Click on the ‘Start’ button
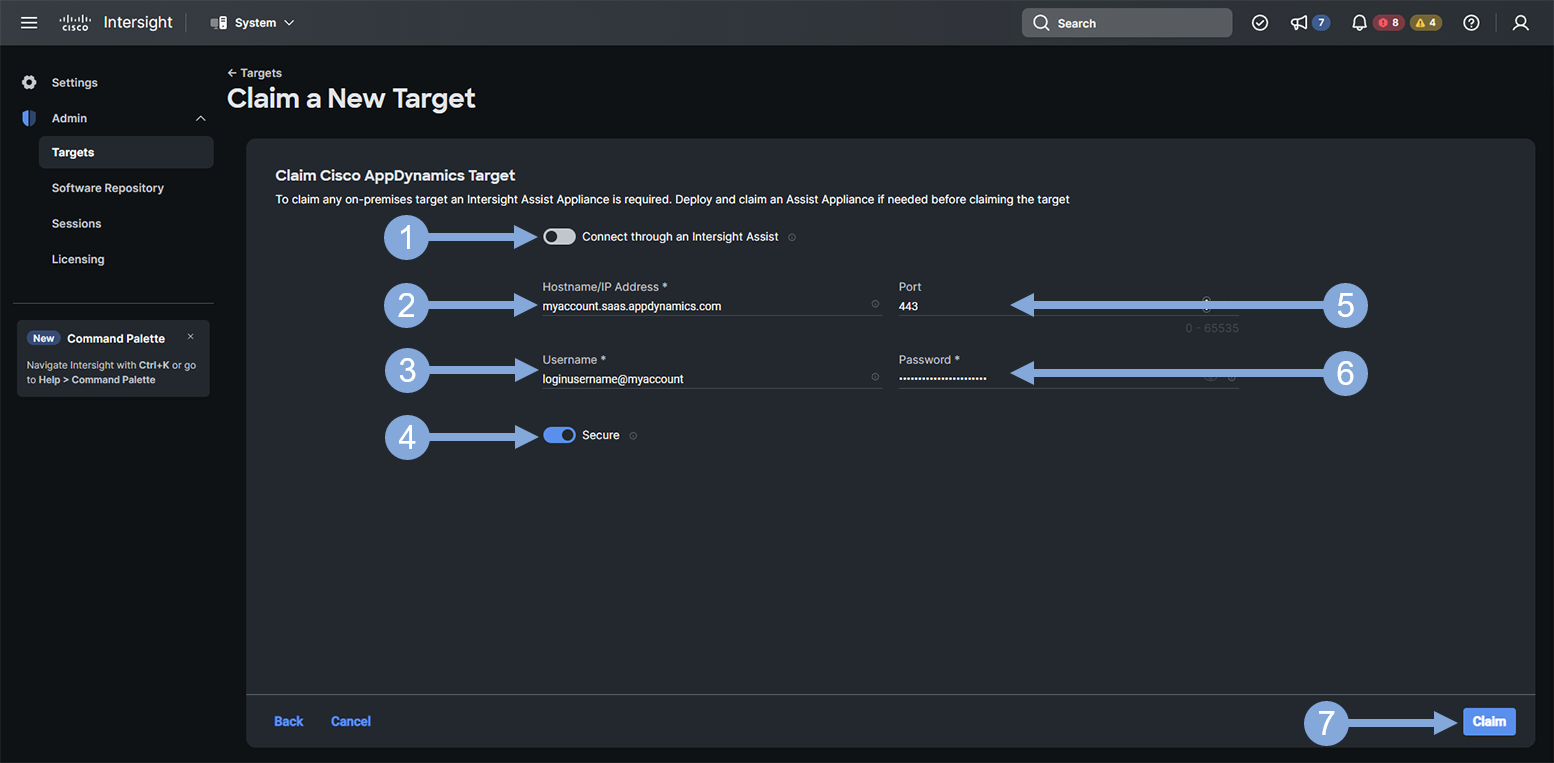
Use the steps below to finish creating your target.
- Switch the ‘Connect through an Intersight Assist’ toggle button to the left so that it is off
- Enter the host name of your AppDynamics controller (without protocol or port)
- Enter the username from your controller that has Admin level privilages
- Switch the ‘Secure’ toggle button to the right so that it is on
- Enter the listener port of your AppDynamics controller
- Enter the password for the user name entered in step three
- Click on the ‘Claim’ button
Next
We’ll finalize the setup in your environment.