Finalize Setup
Introduction
In this section we’ll verify the setup steps you performed and confirm that data is being collected by the different agents you deployed.
Verify AppDynamics Agents
Use the steps below in your Cloud9 IDE to find your login details for the AppDynamics controller.
- On the right-hand navigation tree expand the ‘environment/workshop’ directory
- Double-click on the ‘workshop-user-details.txt’ file to open it
- Use the ‘Controller URL’ in the file to navigate to the AppDynamics controller in your browser
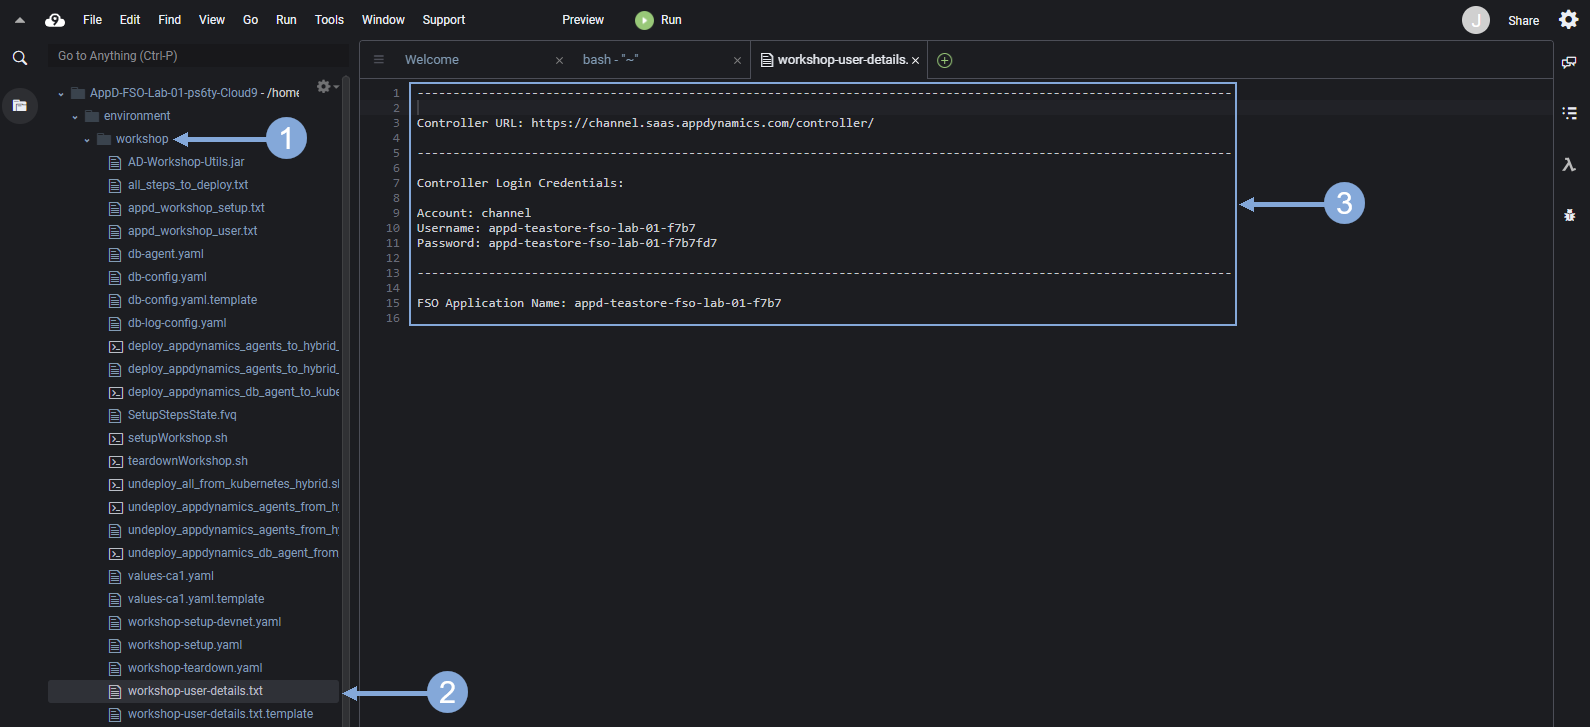
Enter the Account, Username, and Password found in the file to login to the AppDynamics controller.

Use the steps below to navigate to your TeaStore application.
- Click on the ‘Applications’ tab on the top menu
- Find your TeaStore application with your lab number in the name and click on its name to open it
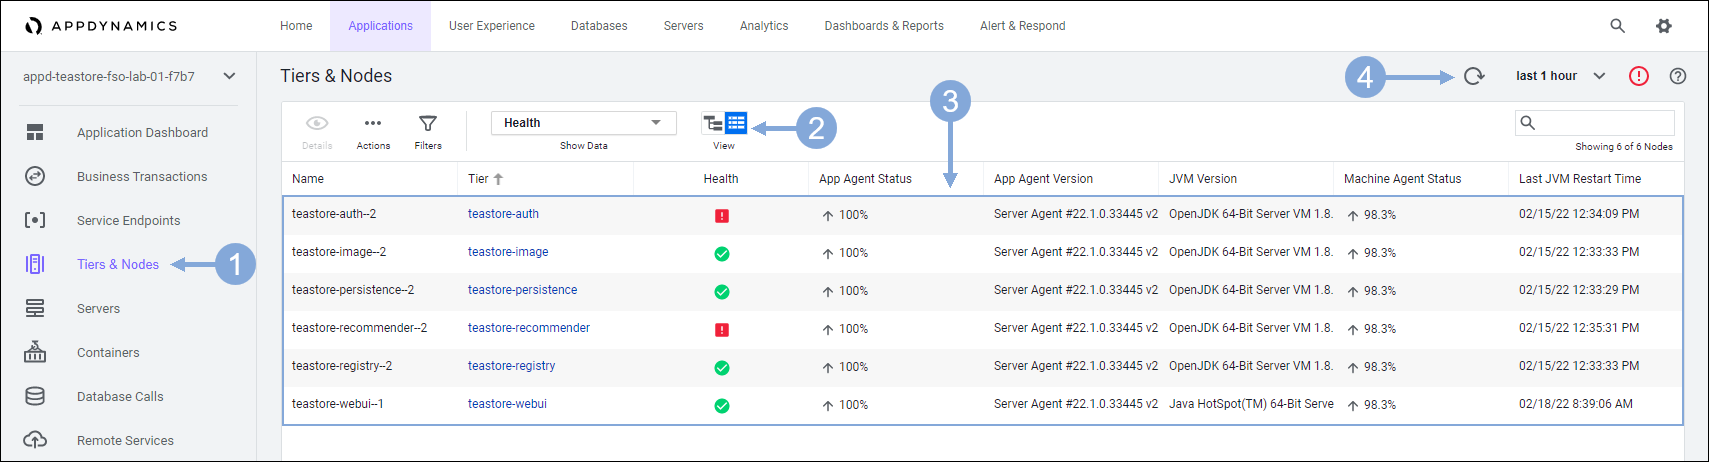
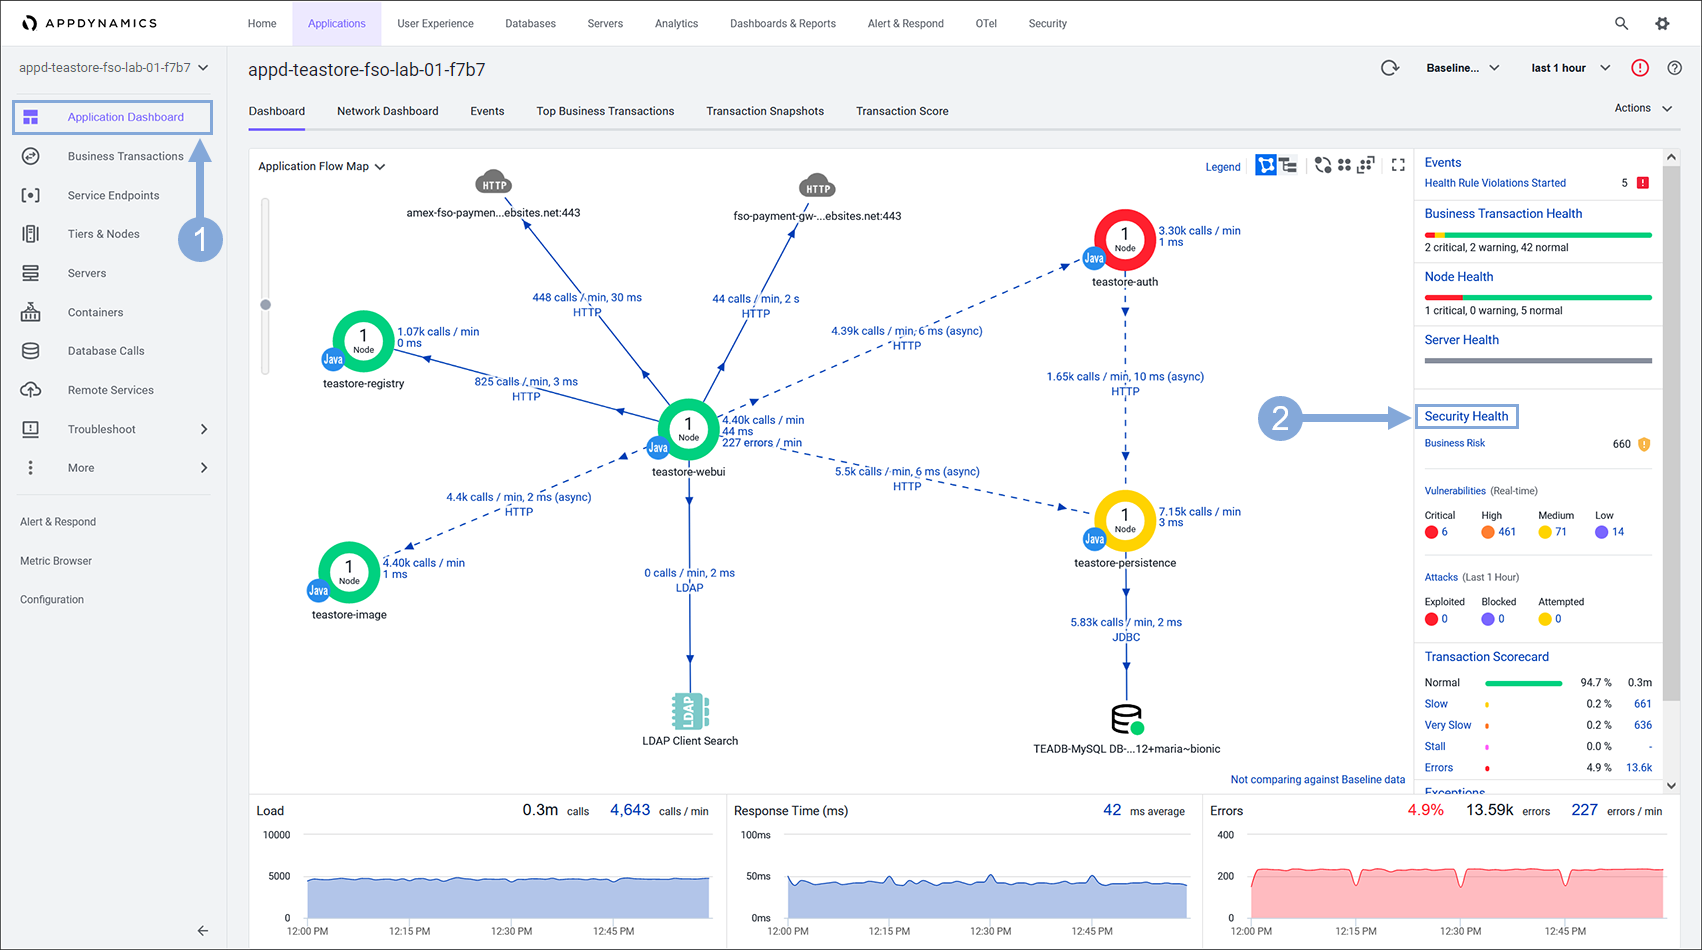
Use the steps below to verify that Tiers & Nodes are registering with the controller.
- Click on the ‘Tiers & Nodes’ tab on the left menu
- Click on the Grid View button
- Check to validate that 6 nodes have registered
- Click on the Refresh button until you see all 6 nodes
If you don’t see all 6 nodes within ~5 minutes you can move on to the next verification steps and come back after that to check that all 6 nodes have registered.
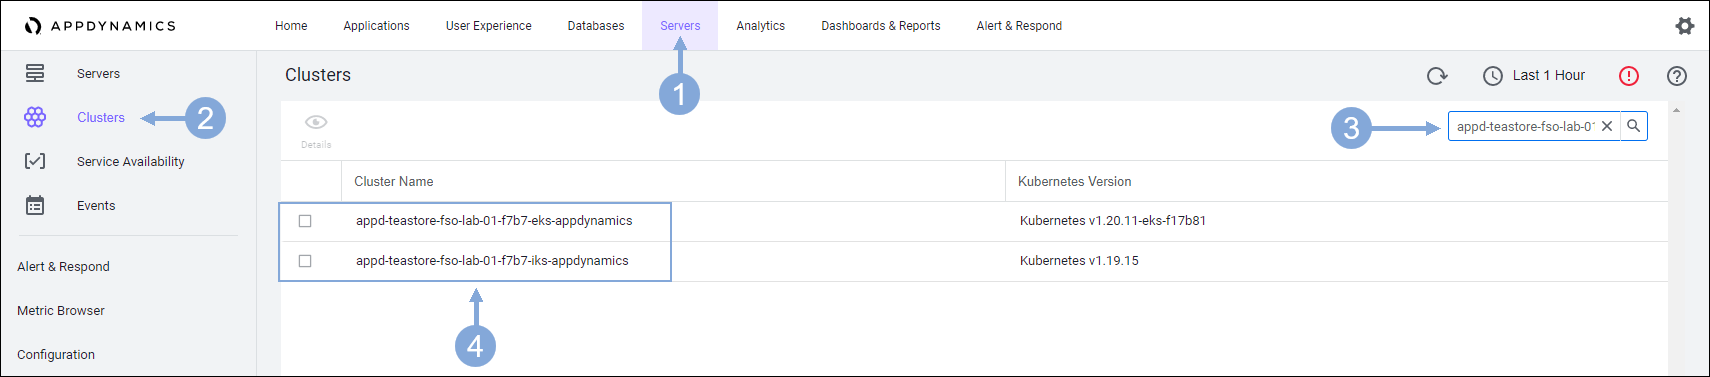
Use the steps below to verify that the Cluster Agents are registering with the controller.
- Click on the ‘Servers’ tab on the top menu
- Click on the ‘Clusters’ tab on the left menu
- Type in appd-teastore-fso-lab-{your-lab-number} in the search box
- Verify that you see 2 Cluster Agents, one for EKS and one for IKS
Configure Secure Application Policy
Use the steps in the previous exercise to navigate to the TeaStore application with your lab number in the name in the AppDynamics controller.
- The application should open on the ‘Application Dashboard’ tab
- Now click on the ‘Security Health’ link to open the Secure Application UI
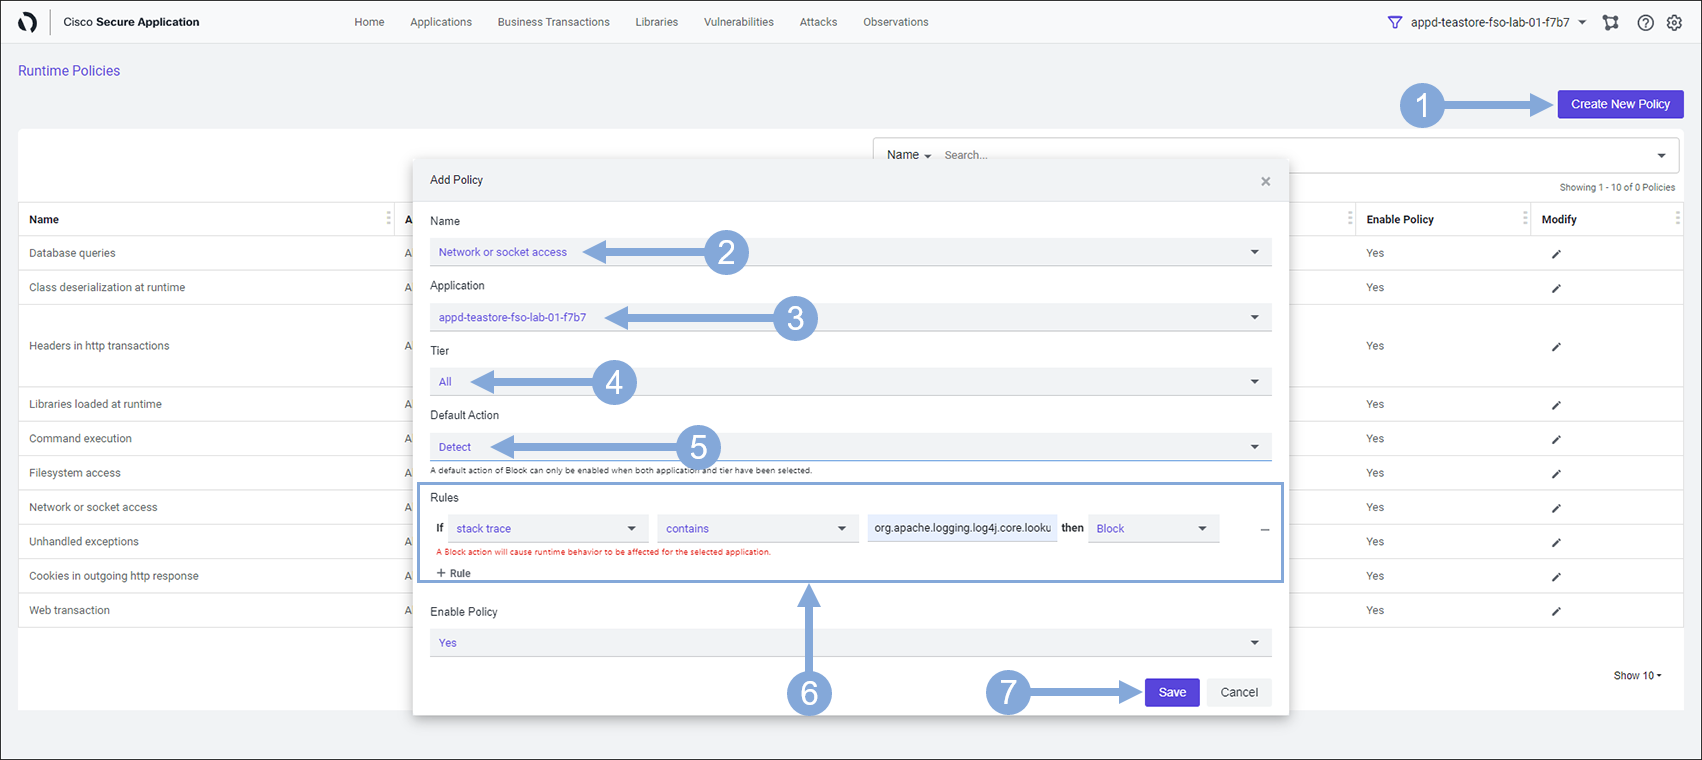
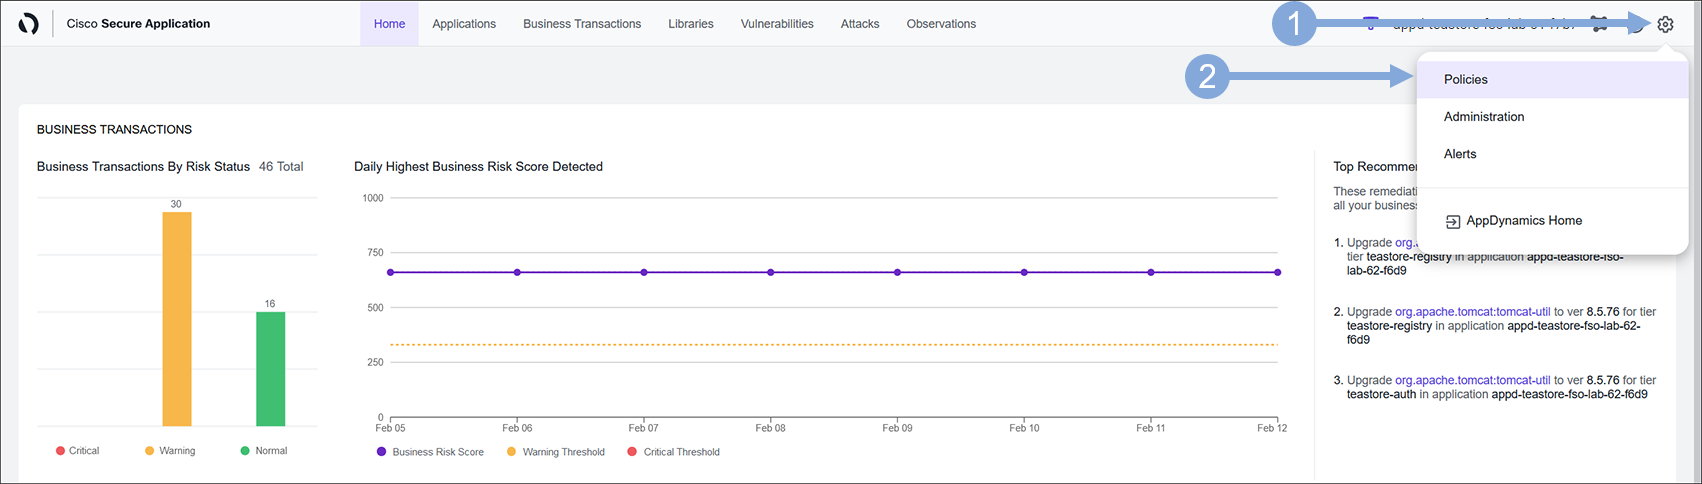
Create a new Policy in Secure Application by using the steps below.
- Click on the ‘Gear’ icon on the far right of the top menu
- Then select ‘Policies’ from the drop-down menu
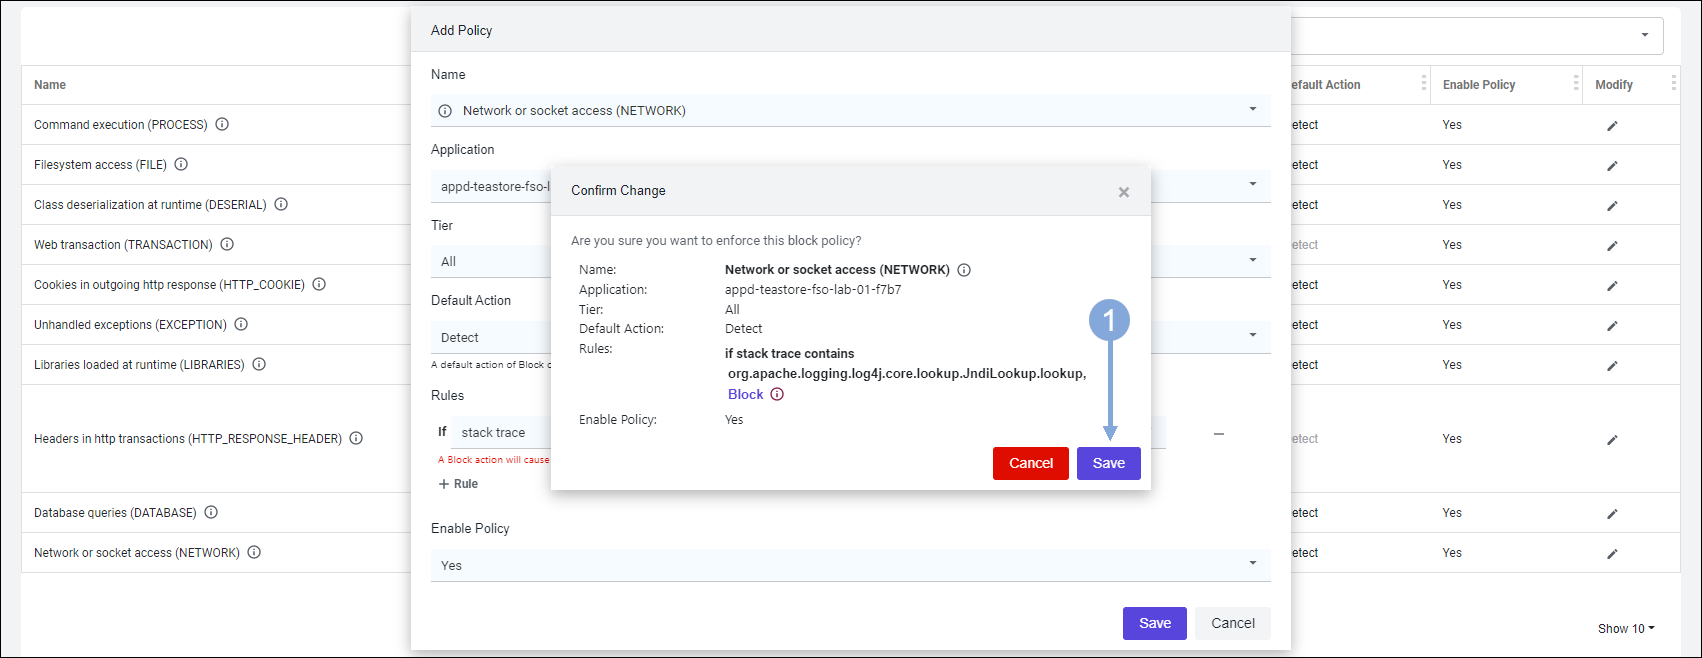
Enter the details of the new Policy by using the steps below.
- Now click on the ‘Create New Policy’ button on the right
- Select Network or socket access (NETWORK)
- Type in fso-lab-{your-lab-number} in the ‘Application’ box and select your TeaStore Application from the drop-down
- Example: fso-lab-01
- The ‘Tier’ field should be set to All
- The ‘Default Action’ field should be set to Detect
- In the ‘Rules’ area:
- Click the + Rule link to add a new rule
- Select stack trace and contains in the first two fields
- Enter the string org.apache.logging.log4j.core.lookup.JndiLookup.lookup in the third field
- Select Block in the fourth field
- Click on the Save button

Click on the Save button to confirm you want to create the Block policy.
Deploy Log4Shell Exploit
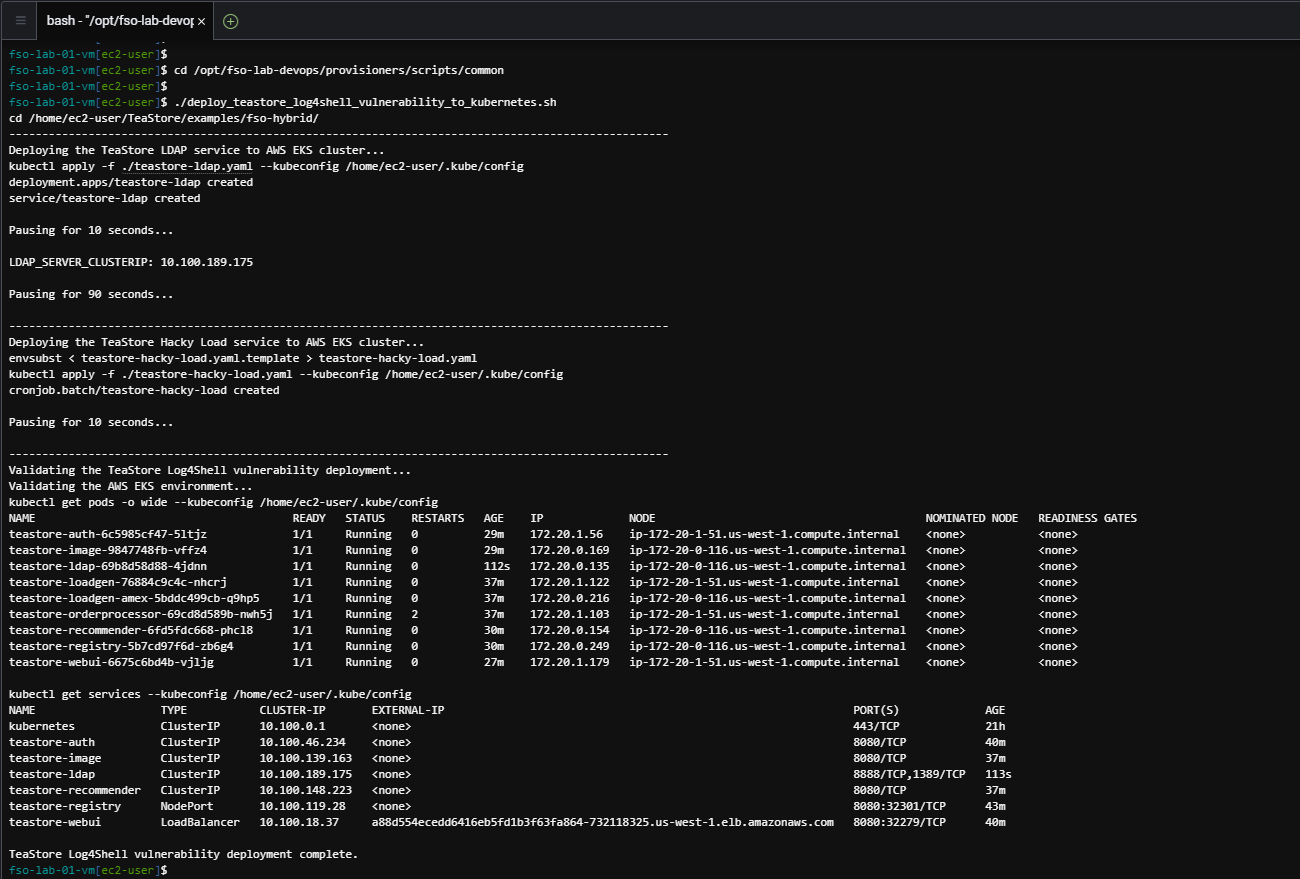
Use the commands below to deploy a small application that will exploit the Log4Shell vulnerability within the TeaStore application.
cd /opt/fso-lab-devops/provisioners/scripts/common

./deploy_teastore_log4shell_vulnerability_to_kubernetes.sh
The output should look like the image below.
Verify IWO Collectors
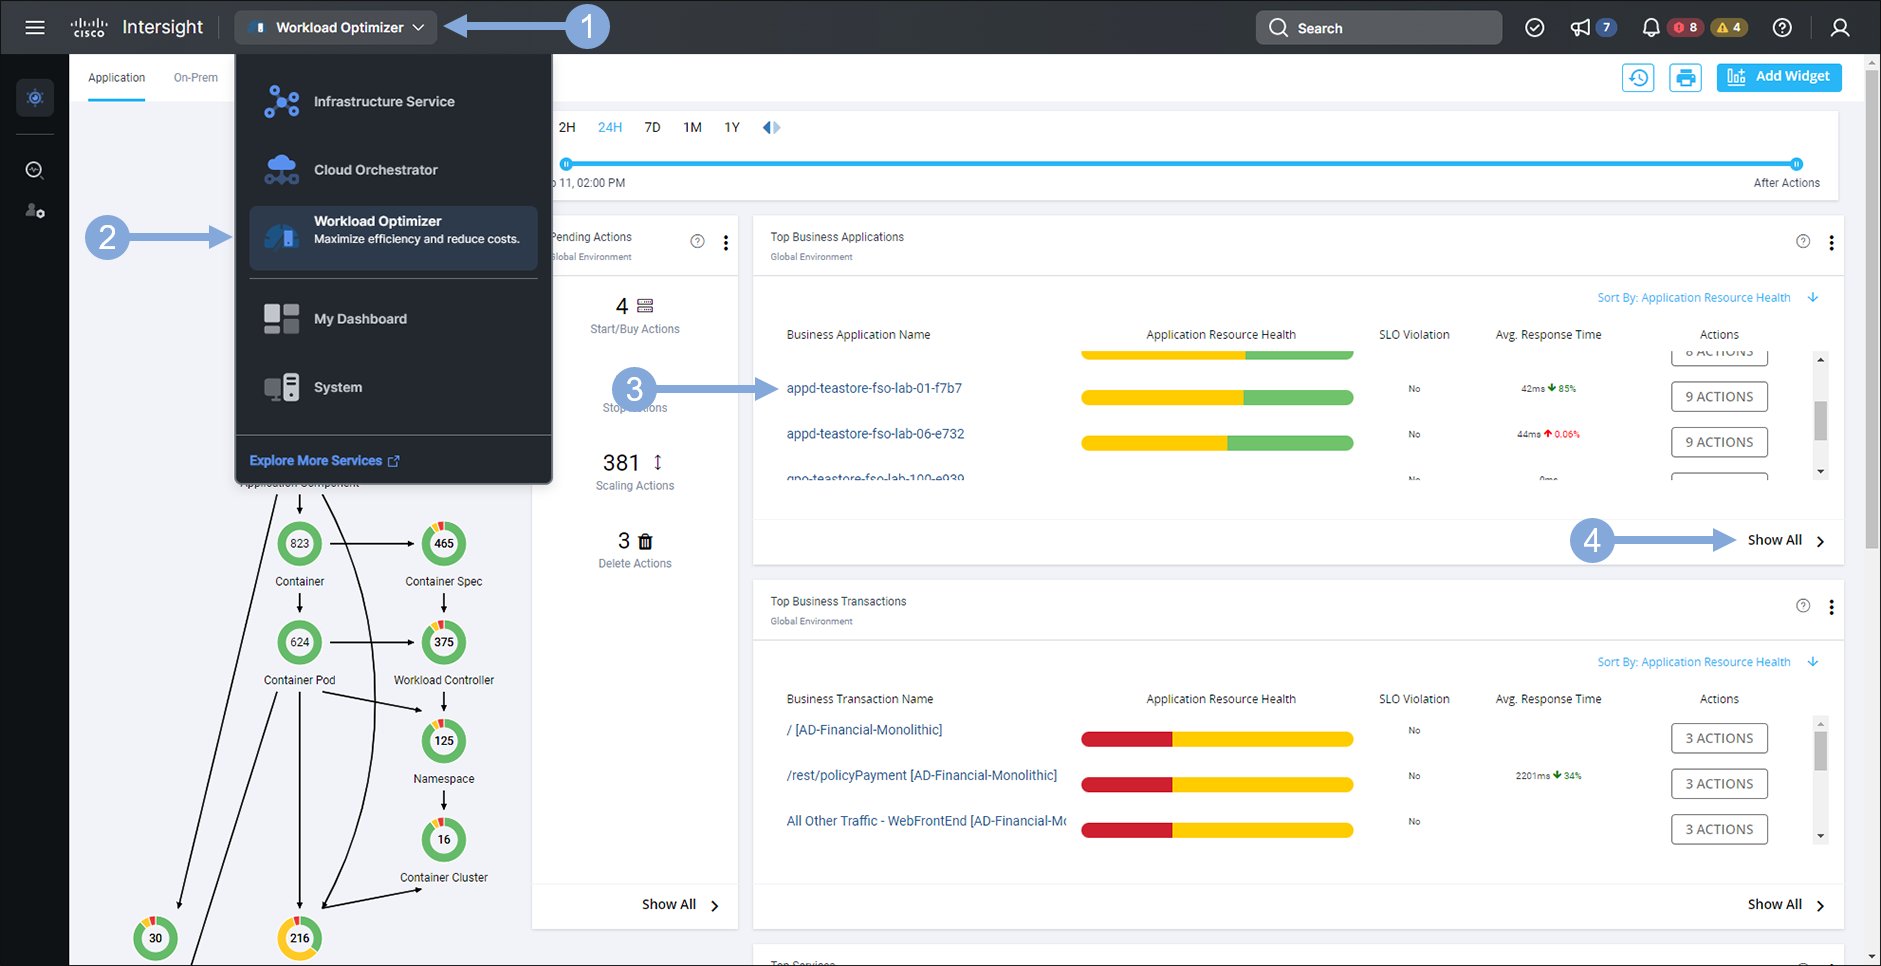
Use the credentials for Cisco Intersight provided by your instructor to login to Intersight if you’ve been logged out.
- Click on the drop-down menu on the left at the top
- Select ‘Workload Optimizer’ from the drop-down menu
- Find the Business Application that has your lab number in the name and verify it is in the list
- If needed click the ‘Show All’ link to find your Business Application and verify it is in the list
Next
Let’s find out what’s next!